Table of contents

最适合街道行驶的宝马 M4 车身套件:购买前需要注意什么

Street
最佳 BMW M4 车身套件

如果您正在为街道驾驶选择宝马 M4 车身套件,最好的选择并非只是视觉上最激进的那一种。一个更好的套件应该能改善车辆的比例,与原厂车身线条完美契合,采用稳定的碳纤维结构,并且仍然适用于正常的道路条件。

对于 G82 车主,RevoZport 宝马 M4 G82 Street Program 遵循了这种更为审慎的方法。它为汽车的前部、侧面和后部增加了一套完整的碳纤维外观系统,同时保持了宝马原有的设计语言。

在本指南中,我们将探讨什么样的宝马 M4 车身套件适合街道使用,不同套件风格的比较,在最终确定设置之前需要检查什么,以及为什么材料质量和原厂配件逻辑与外观一样重要。

什么样的宝马 M4 车身套件适合街道驾驶?

一个适合街道使用的宝马 M4 车身套件应该在不影响日常驾驶体验的情况下改善车辆外观。合适的套件需要完美的安装、可用的离地间隙、优质的材料以及从前唇到后扩散器都协调的设计。

Brown BMW car parked on a city street with a building in the background

街道使用需要平衡,而非极致空气动力学

宝马 M4 本身就拥有强劲的原厂造型。许多车主想要的是更精致的外观,尤其是在下前保险杠、侧面轮廓和后部。

对于街道驾驶,目标是可控的激进。汽车应该比原厂看起来更锐利,但仍应能应对正常的道路、车道、停车场坡道和减速带。一个在照片中看起来很棒的前唇,如果每次驶出车库都会刮擦,就会很快成为问题。

安装、离地间隙和日常可用性至关重要

安装是人们在宝马 M4 车身套件上首先注意到的事情之一。当缝隙不均匀或面板不符合原厂线条时,即使是昂贵的碳纤维也可能显得廉价。

高质量的宝马 M4 G82 车身套件应该遵循原始车身形状,使用清晰的安装点,并允许专业安装人员确保每个部件的精确对齐。如果您添加多个组件,例如前唇、侧裙、扩散器、扰流板、引擎盖和挡泥板,这一点就更加重要。

日常可用性也很重要。如果您的 M4 已经降低,在选择最低的前唇设置之前,请检查您当地的道路、陡峭的车道和停车场坡道。街道套件应该让您的汽车看起来更好,而不是让您像规划路障地图一样规划每一条路线。

Close-up of a bronze car's front hood and wheel on a dark surface

一套完整的套件应该从前到后看起来一体化

最好的宝马 M4 车身套件不应该看起来像是随着时间推移随意添加的部件。前唇、侧裙、扩散器、扰流板、引擎盖和挡泥板应该共享相同的设计语言。

这就是为什么完整的碳纤维套件通常比混搭不同品牌的部件效果更好。当纹理、光洁度和形状在整个汽车上保持一致时,整个改装看起来更简洁、更有意图。

适合街道驾驶的宝马 M4 车身套件有哪些最佳选择?

最适合街道驾驶的宝马 M4 车身套件通常是完整的碳纤维空气动力学套件,而不是全宽体改装。您可以获得更精致的外观结构、更好的前后流动性,以及更少的日常可用性问题。

以下是比较您选择的简单方法:

宝马 M4 车身套件选项

最适合

主要注意事项

完整的碳纤维街道套件

希望打造具有前后一致设计的精致街道车型的车主

比单独购买一两个部件成本更高

宽体套件

需要更宽的姿态、不同的轮毂配件或更大幅度的车身改变的改装

安装更复杂,日常使用不便

原厂风格空气动力学套件

例如前唇、扰流板或扩散器等小幅升级

在 G82 上可能仍然显得不完整

性能导向型空气动力学套件

需要更多功能性外观细节的街车

如果设计过于激进,可能会显得过于臃肿

街道驾驶最佳整体选择:RevoZport 碳纤维街道套件

对于大多数宝马 M4 G82 车主来说,RevoZport 宝马 M4 G82 碳纤维车身套件是街道驾驶最强劲的选择。它不试图隐藏 G82 的格栅或改变汽车的核心身份。相反,它为前部、侧面和后部提供了更完整的碳纤维结构,同时保持了宝马的设计语言。

完整的套件可以包括前唇、前饰条、前通风口、格栅、引擎盖、侧裙、侧挡泥板、后扩散器、扰流板、行李箱盖和排气管。这种完整的设置是主要优势。汽车从前到后看起来都是经过精心设计的,而不是像后来添加了一些独立的部件。

Gold sports car parked on a road with trees in the background

最适合营造更宽视觉效果:宽体套件

如果您的宝马 M4 需要更宽的姿态、不同的车轮配置或更强的视觉变化,宽体套件可能会很有效。不过,对于街道驾驶来说,它不总是最平衡的选择。

G82 已经拥有强劲的原厂宽度和视觉重量。许多车主通过升级前唇、侧裙、扩散器、扰流板和引擎盖会获得更简洁的效果,然后再考虑更宽的车身。

最适合日常低调使用:原厂风格空气动力学套件

如果您只想要一个更简洁的前唇、一个适度的扰流板或一个更突出的扩散器,原厂风格的空气动力学套件是可行的。这个选项易于使用,并使汽车接近原厂状态。

缺点是它可能无法完全解决 G82 的视觉空缺。原厂的前后部分留有足够的开放空间,一个更完整的宝马 M4 车身套件最终可能会看起来更好。

最适合性能导向型街道改装:功能性空气动力学套件

性能导向型空气动力学套件适合那些希望外部细节具有更清晰功能用途的车主,例如引擎盖通风口、前通风口、侧挡泥板和后扩散器。

对于街道驾驶的 M4 来说,克制很重要。套件应该增加结构和用途,但汽车在正常道路环境下仍应感觉精致,而不是为了日常使用而过度改装。

如何选择适合街道使用的宝马 M4 车身套件?

在选择宝马 M4 车身套件时,首先要检查五个方面:平台兼容性、驾驶环境、材料结构、安装逻辑和离地间隙。这些因素决定了套件是会成为汽车的自然延伸,还是一个售后市场的妥协。

首先确认您的宝马 M4 代系

从准确的平台开始。为某一 M4 代系制造的车身套件不会自动适用于另一代系,即使产品名称看起来相似。

本指南的重点是宝马 M4 G82 Coupe。RevoZport Street Program 是为 2021 年及以后生产的宝马 M4 G82 Coupe 开发的。在订购前格栅之前,您还需要确认您的汽车是否配备 ACC,即自适应巡航控制。RevoZport 为配备 ACC 和未配备 ACC 的车辆提供不同的格栅版本,因此这是购买前应检查的配件细节。

根据您的驾驶需求选择标准空气动力学套件或宽体套件

对于街道驾驶的 M4 来说,标准碳纤维空气动力学套件通常是更平衡的选择。它改善了前部、侧面和后部,同时保持了原厂轮廓不变。

宽体套件更适合需要不同姿态、车轮设置或外部宽度的改装。对于大多数街道车主来说,首先完善现有车身结构更有意义。前唇、侧裙、后扩散器、扰流板、引擎盖和挡泥板通常比单纯的宽体对汽车的视觉平衡产生更直接的影响。

购买前比较材料

材料质量影响表面稳定性、边缘清晰度、部件重量和长期光洁度的一致性。这就是为什么碳纤维结构应该被视为工程选择,而不仅仅是视觉升级。

RevoZport 在其 Street Program 中使用优质预浸干式碳纤维,采用 3x3 Toray 碳纤维编织、高压釜固化和抗紫外线透明涂层。对于买家来说,这些细节意味着对树脂含量、编织一致性、表面清晰度和光洁度保护的更好控制。它们还有助于各个部件在作为完整的宝马 M4 车身套件安装时保持一致的外观。

检查安装和安装要求

RevoZport G82 Street Program 围绕原厂配件和原厂螺栓固定逻辑开发。大多数组件无需切割原厂车身结构即可安装,这正是您希望保持良好状态的街车所需的。

在确认设置之前需要了解几点:

  • 侧挡泥板: 更换原厂螺栓固定部件,需要调整挡泥板内衬

  • 前格栅: 必须根据您的车辆规格选择 — 带 ACC 或不带 ACC

  • 专业安装: 建议所有组件都由专业人员安装,以确保正确的对齐、面板间隙和最终的光洁度质量

Brown sports car on a cobblestone road with autumn leaves and trees in the background

考虑离地间隙和日常路况

前唇和较低的空气动力学部件靠近地面,因此离地间隙应作为安装决策的一部分。如果您的 M4 已经通过绞牙减震器或弹簧降低,这一点尤其重要。

在选择最低前部设置之前,请考虑您的日常路线、车道角度、停车场坡道和当地路面情况。一个精心选择的宝马 M4 车身套件应该能改善汽车的姿态和视觉结构,而不会使正常的街道使用变得困难。

宝马 M4 车身套件能为街道驾驶带来哪些改进?

一个精心设计的宝马 M4 车身套件可以改善 G82 的三个方面:外观结构、前后视觉流动性和材料一致性。当部件被设计成一个系统而不是从不同来源逐一选择时,这些改进最为明显。

更完整的外观存在感

G82 本身就具有强大的视觉存在感。RevoZport 所增加的是更清晰的外部结构。 宝马 M4 G82 碳纤维前唇 为下前部增添了更清晰的边缘,而前饰条和前通风口在不替换原始保险杠底座的情况下支持相同的视觉方向。

宝马 M4 G82 碳纤维引擎盖 加强了上部前区,并有助于前部在低角度和四分之三角度下都感觉更完整。与格栅、侧裙、侧挡泥板、后扩散器、扰流板、行李箱盖和排气管一起,这辆车看起来像是一个完整的碳纤维街道改装,而不是一个带有独立附加部件的原厂车身。

更好的前后侧视觉流动性

一个整体设计系统是很有价值的,因为每个部分都支持下一个部分。RevoZport G82 Street Program 通过共享材料、表面光洁度和车身线条逻辑,将前部、侧部和后部连接起来。

前部:碳纤维前唇、前饰条、前通风口和引擎盖完善了下部和上部前区。这些部件不是让保险杠看起来像一个独立的附加物,而是帮助前部感觉更有结构感。

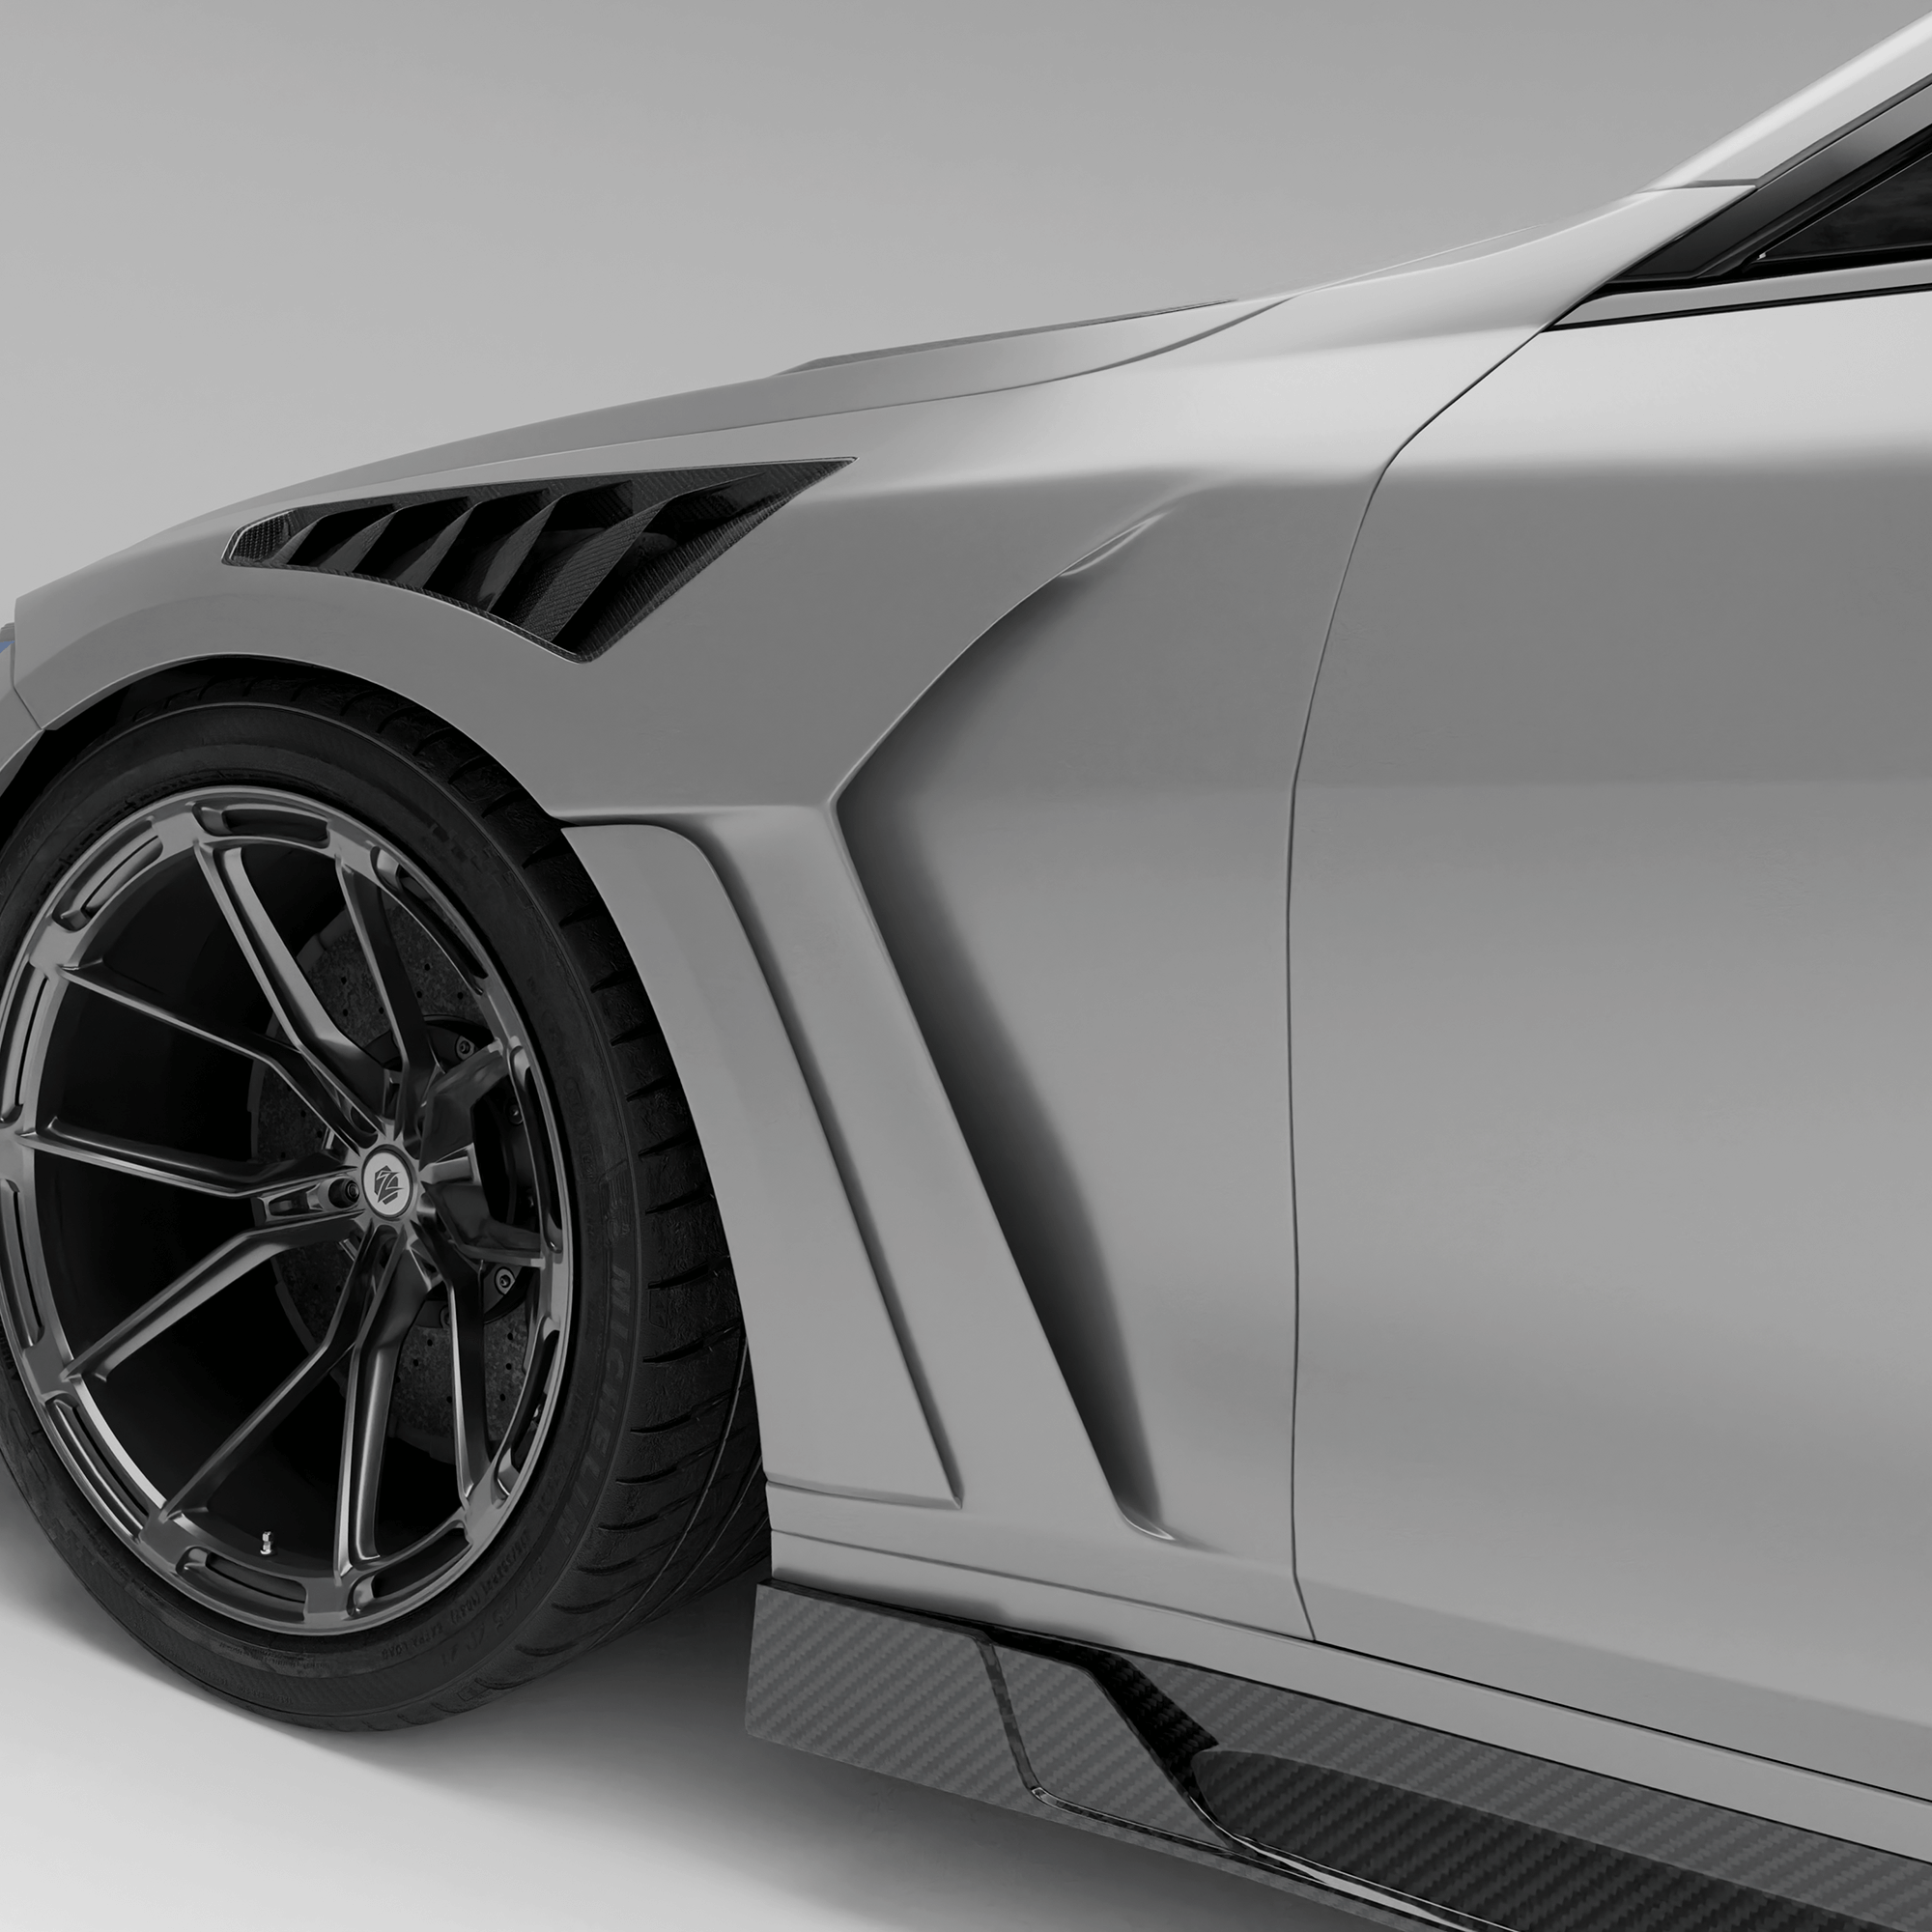
侧部: 宝马 M4 G82 碳纤维侧裙 营造出更简洁的侧面轮廓,并在视觉上连接了前部和后部。 宝马 M4 G82 碳纤维侧挡泥板 增加了更多技术性的外部细节,同时保持了汽车在 G82 原有车身语言中的特色。

后部: 宝马 M4 G82 碳纤维后扩散器 延伸并构筑了下部后部。行李箱盖、扰流板和排气管完善了后部,使其与汽车更宽的后轮拱保持一致。

前部变得更加清晰,侧面轮廓感觉更加连续,后部获得了原厂车身所留下的深度。

更一致的碳纤维表面处理

当整个改装在视觉上保持一致时,碳纤维的效果最佳。如果一个部件具有不同的编织图案、光泽水平或边缘光洁度,可能会使外观显得不协调。

RevoZport M4 G82 Street Program 的每个组件都采用 3x3 Toray 编织干式碳纤维结构、高压釜固化和抗紫外线透明涂层。其目标是实现一致的编织方向、整洁的边缘和在整个外部看起来经过精心设计的表面处理。在正常的街道使用中,抗紫外线透明涂层还有助于长时间保持表面光泽和编织清晰度。

为什么 RevoZport 是宝马 M4 G82 车主的强大选择?

RevoZport 是宝马 M4 G82 车主的强大选择,因为其 Street Program 专注于系统设计、材料一致性、原厂配件逻辑和街道可用性。它是为那些希望拥有更完整的碳纤维外观而又不改变汽车核心身份的车主而设计的。

Close-up of an orange car's hood and front wheel on a road

设计为完整的碳纤维升级套件

选择 RevoZport 最重要的原因是该套件被设计为一个系统,而不是一系列独立的装饰部件。每个组件都支持 G82 的特定区域:前部结构、侧面连续性、后部深度或整体碳纤维身份。

这使得 碳纤维汽车部件 在整个改装中扮演着更受控的角色。当您看到一辆完成的 RevoZport G82 时,前部、侧面和后部感觉是经过精心规划的,而不是由不相关的外部部件组装而成的。

碳纤维结构实现高级升级

该套件采用优质预浸干式碳纤维,具有 3x3 Toray 编织、高压釜固化和抗紫外线透明涂层。对于关心材料质量的 G82 车主来说,这些细节不仅影响外观。

预浸干式碳纤维有助于控制树脂含量和部件一致性。高压釜固化支持面板的密度和结构稳定性。3x3 Toray 编织使暴露的表面具有干净、一致的图案,而抗紫外线透明涂层有助于在正常街道使用期间保护光泽和编织清晰度。

这种材料方向与 M4 本身的价格水平和特性相匹配。

为宝马 M4 G82 设计的配件

RevoZport 的每个部件均围绕 G82 车身造型和原厂匹配逻辑开发。这些部件是特定型号的,围绕原始车身线条、安装结构和工厂面板流程制造。您不会将通用的碳纤维套件改装到您的汽车上。您选择的是专为该平台设计的部件。

一些值得记住的安装注意事项:

前格栅:适用于带 ACC 和不带 ACC 的车辆。您必须在选择部件之前选择正确的版本。
侧翼子板:更换部件,在安装过程中需要调整翼子板衬里。
专业安装:建议用于确保正确的面板间隙、对齐和表面光洁度。

专为追求街道实用性和性能风格的车主打造

该套件专为宝马 M4 车主设计,他们希望在不将汽车推向赛道专用外观的情况下,获得更具结构感的街道表现。RevoZport 街道系列为汽车提供了更简洁的碳纤维饰面、更强的外部清晰度以及更完整的前后布局,同时保持了原始车身线条的可识别性。

如果您想要 性能升级,但又尊重 M4 的工厂特性而不是取代它,那么这个方向是合理的。

比混合随机外部零件更好的选择

混合不同品牌的零件可能会让 G82 感觉不那么协调。前部、侧面和后部需要在设计语言、编织图案、光泽度和表面光洁度方面保持一致。当它们不一致时,这种不一致性很容易被发现。

RevoZport 为您提供了一个清晰的系统。前唇、前饰件、通风口、格栅、引擎盖、侧裙、侧翼子板、后扩散器、扰流板、后备箱盖和排气管都可以单独购买。但它们作为完整的街道系列最有意义,因为它们是在相同的外观概念下设计的。

Orange BMW car on a road with autumn leaves on the side

结论

最适合街道驾驶的宝马 M4 车身套件应该让汽车感觉更完整,而不是显得生硬。对于 G82 而言,这意味着整洁的安装、受控的比例、一致的碳纤维结构以及仍然尊重原始宝马车身线条的前后设计。

RevoZport 街道系列就是围绕这种平衡而构建的。它优化了塑料感较重的前部区域,改善了侧面视觉流畅性,增加了后部结构,并赋予整车一致的干式碳纤维特性。每个部件都经过统一设计,采用 3x3 东丽编织预浸料干式碳纤维制成,经过高压釜固化和抗紫外线透明涂层处理,并根据 G82 平台的 OEM 安装逻辑开发。

如果您准备为您的 M4 配备更完整的碳纤维外观,请探索完整的 RevoZport 宝马 M4 G82 街道系列,并查看哪些部件适合您的改装方向。

关于宝马 M4 车身套件的常见问题

宝马 M4 加装碳纤维车身套件值得吗?

是的,如果碳纤维车身套件安装得当、符合原厂车身线条并能改善整体外观设计,那么宝马 M4 加装碳纤维车身套件是值得的。对于街头驾驶的 G82 来说,不要仅仅通过碳纤维本身来判断套件。安装、表面光洁度、编织一致性和安装质量与材料本身同样重要。

宝马 M4 G82 的空气动力学套件和宽体套件有什么区别?

空气动力学套件增加了前唇、侧裙、扩散器、扰流板、引擎盖和通风口等部件,以优化汽车的造型,而不会改变其整体宽度。宽体套件通过更宽的挡泥板或加长的车身面板改变汽车的姿态和车身宽度。对于大多数街头驾驶的 G82 改装车来说,空气动力学套件是更平衡的选择。

哪种宝马 M4 车身套件更适合日常街道驾驶?

对于日常街道驾驶来说,一套完整的碳纤维空气动力学套件通常是宝马 M4 的更好选择。它改善了前部、侧面和后部结构,同时保持了原厂轮廓不变。对于大多数 G82 车主来说,RevoZport 宝马 M4 G82 街道系列符合这个方向,因为它平衡了街道实用性、碳纤维饰面、OEM 匹配逻辑和集成空气动力学设计。

Explore Our Full Range of Tuning Accessories

0 条评论

发表评论

您可能还会喜欢阅读

BMW XM Body Kit Guide
Street

September 01, 2026

BMW XM Body Kit Guide: Carbon Fiber Upgrades for Daily Driving

A BMW XM body kit works best when its carbon elements connect the G09’s tall front, broad sides and rear built around vertically stacked exhaust outlets. Treating these areas as one composition gives the XM a clearer exterior rhythm while preserving its commanding proportions. The RevoZport Street Program extends from the front lip and vented hood to the wheel arches, doors, side skirts, tailgate, roofline and rear diffuser. Owners can shape a complete exterior or focus on the area that best suits the car’s color, wheels, ride height and daily use. What Does the RevoZport BMW XM Body Kit Include? The RevoZport BMW XM body kit brings together nine carbon fiber product types across the front, sides and rear. Each group addresses a different part of the G09’s visual mass while continuing the same lower-body and upper-rear design language. Vehicle Area Included Components Role in the Exterior Front Front lip, front bumper vent trims, carbon fiber hood Grounds the tall front and carries carbon from the lower bumper toward the hood Side Wheel arch trims, lower door extensions, side skirts Draws a continuous line across the arches, doors and rocker area Rear Rear diffuser, tailgate trim panel, roof spoiler Frames the stacked exhaust layout and connects the lower rear with the tailgate and roofline The program combines add-on, bolt-on and full-replacement components. The vented hood replaces the factory panel, while the remaining parts develop the exterior through the bumper, wheel-arch, door, rocker, tailgate and roof areas. This mixed architecture allows the package to reshape several levels of the XM without making every component follow the same installation method. The BMW XM G09 body kit combines autoclave-cured prepreg dry carbon with a Toray 3×3 weave. Gloss exposed carbon and a UV-resistant clear coat give the nine-component exterior program a consistent finish across the front, sides, and rear. Selected components are also available by request in matte carbon, forged carbon, or gloss black, allowing the surface treatment to complement the XM’s paintwork and exterior details. Optional RevoZport stainless steel exhaust tips are available in silver or gloss black. They frame the XM’s vertically stacked outlets and complement the nine-component carbon program with a coordinated metal accent around the rear diffuser. How Does the BMW XM Body Kit Fit Each G09 Variant? The RevoZport BMW XM body kit is specified for the G09 from model year 2023 onward. The listed applications include the BMW XM, XM Label, XM Label Red and XM 50e, giving the Street Program one defined chassis range across the current variants. Which BMW XM G09 Variants Are Covered? The essential fitment identifiers are the G09 chassis, a 2023-or-later model year and one of the four listed XM variants. Within that range, the nine-part program follows the same front, side and rear architecture, while the vehicle’s original exterior equipment remains relevant to individual component interfaces. This is especially important at the rear. The XM’s parking technology, lighting and available electrically deployable tow hitch occupy the same area as the diffuser, so their integration matters alongside the external panel shape. How Do the Components Meet the Factory Bodywork? RevoZport lists the Street Program with model-specific geometry and OEM-style fitment through the vehicle’s existing mounting points. The complete package combines add-on, bolt-on and replacement components without requiring cutting or drilling. Each type of component creates a different fitting task. Exterior additions need to follow the original bumper, arch, door or roof contours evenly. The replacement hood must sit correctly between both fenders and maintain consistent height at the grille before its opening, closing and locking functions are checked. At the rear, the diffuser is installed around the original bumper structure, exhaust area, parking sensors, light strip and associated wiring. Its tow-hitch access cover allows vehicles equipped with BMW’s electrically deployable tow hitch to retain that original function. Professional installation is recommended for the complete package and the larger replacement components. The BMW G09 XM dry carbon fiber body kit installation case follows the test-fitting, alignment, factory-component transfer and final function checks on a completed XM. What Makes the BMW XM Body Kit Practical for Daily Driving? A daily-driven BMW XM places the body kit in contact with factory electronics, changing road surfaces and regular exterior exposure. Model-specific interfaces, usable clearance and a consistent finish therefore matter alongside the visual relationship between the components. Factory Electronics and Rear Equipment The RevoZport Street Program is designed to remain compatible with the XM’s factory sensors, cameras and assistance systems. At the rear, the diffuser accommodates the original parking sensors, light strip, wiring and exhaust area as part of one integrated lower section. The diffuser also retains access for BMW’s electrically deployable tow hitch through a dedicated cover. This allows the rear treatment to follow the XM’s vertically stacked exhaust design while preserving one of the vehicle’s distinctive utility features. Once installation is complete, exterior alignment and the nearby factory functions form one finished result. Sensor response, cameras, lighting, hood operation and tow-hitch movement should all work correctly alongside clean panel gaps and secure mounting. Clearance on Everyday Roads The front lip, side skirts and rear diffuser define the lowest points of the carbon package. Their relationship with ramps, speed bumps, driveway transitions and parking curbs depends on ride height, tire dimensions, vehicle load and the shape of the road surface. A lowered XM brings these edges closer to the road while intensifying the lower visual line. An XM at factory ride height leaves more space beneath the carbon components. Suspension stance and daily routes should therefore be considered within the same exterior plan. Sharp changes in road angle deserve particular attention at the front lip. A measured approach to steep ramps and additional distance from high curbs help protect the projected lower edge during regular use. Carbon Finish and Exterior Care The standard package uses autoclave-cured prepreg dry carbon with a Toray 3×3 weave, gloss exposed finish and UV-resistant clear coat. Across multiple panels, consistent weave direction, carbon tone and gloss level help the material read as part of the XM’s architecture. Exposure varies across the vehicle. The front lip, wheel arch trims, lower door extensions, side skirts and diffuser encounter more road film, water and debris than the hood, tailgate trim or roof spoiler. Regular, gentle exterior care is therefore especially important around low edges, panel joints and outward-facing corners. Finish selection also changes the character of the package. Gloss exposed carbon brings depth and reflection to the weave, matte carbon produces a quieter surface, forged carbon creates a more irregular pattern, and gloss black emphasizes component shape with less visible weave. When several parts meet within the same viewing angle, a consistent finish gives the exterior the strongest visual continuity. Where Should the BMW XM Body Kit Make the Strongest Visual Change? The BMW XM body kit can create one continuous carbon exterior or place greater emphasis on the front, side or rear. The strongest direction depends on how the G09 is most often viewed, which factory surfaces need more definition and how the carbon should interact with paint, wheels and ride height. A Complete Carbon Exterior A complete exterior connects all nine carbon product types across the XM’s tall front, broad sides and layered rear. The front lip and hood establish the leading edge, the arch, door and rocker components continue the material through the vehicle’s long middle section, and the diffuser, tailgate trim and roof spoiler complete the rear at three different heights. This direction gives the carbon weave and finish a visible path around the entire vehicle. Body color controls the level of contrast, while wheel design and ride height influence how strongly the lower line frames the XM’s stance. Existing carbon details can then be matched to the same gloss level and surface character. RevoZport positions the XM alongside its other model-specific BMW body kits within the Street Program, with the emphasis on a cohesive road-oriented exterior. A More Defined Front End The XM concentrates much of its visual mass around the grille, lighting and high hood line. A front-led direction uses the front lip to establish a lower horizontal base, then carries carbon upward through the bumper vent trims and replacement hood. The vent trims frame the factory openings and connect the lip with the upper bumper surfaces. Above them, the BMW XM carbon fiber hood introduces the largest single carbon surface in the group. Its vented form follows the XM’s shoulder lines while adding functional openings and greater depth across the upper front. The lip produces the most restrained change on its own. Adding the vent trims creates a more complete bumper composition, while including the hood gives the entire front view a stronger carbon identity. A Longer, Lower-Looking Side Profile The side treatment works through the relationship between the wheel arch trims, lower door extensions and side skirts. Together, they carry one carbon line across the arches, the XM’s expansive door surfaces and the lower rocker area. Using all three component groups makes the side appear longer and visually lower. The arch trims frame the wheels, the door extensions occupy the broad center section, and the side skirts prevent the carbon line from ending abruptly between the axles. Paint color, wheel finish, tire sidewall and ride height determine how strongly this line appears. Gloss carbon can merge into a continuous shadow on a dark body or create a defined outline against lighter paint. A lower stance intensifies the visual connection with the road, while factory ride height preserves more open space beneath the side skirts. A More Structured Rear The rear direction uses the diffuser, tailgate trim panel and roof spoiler to work with the XM’s vertically stacked exhaust outlets. The diffuser forms the lower level, the tailgate trim establishes a horizontal middle line, and the roof spoiler carries the material to the upper edge. Together, these three levels guide the eye from the exhaust area toward the tailgate and roofline. The diffuser adds depth around the lower bumper, while the middle and upper pieces stop the carbon treatment from becoming concentrated in one area. This relationship is especially clear from a rear three-quarter view. From that angle, the side skirts and wheel arch trims can lead directly into the diffuser, while the tailgate trim and roof spoiler complete the carbon structure above them. The rear components can also form a phased direction. Starting with the diffuser gives the stacked exhaust area a stronger base, while the tailgate trim and roof spoiler extend the treatment upward when a more complete rear composition is the goal. Frequently Asked Questions Can BMW XM Body Kit Components Be Fitted Separately? Yes. The nine carbon product types are available as individual components, allowing the exterior to follow a complete, front-led, side-led or rear-led direction. Adjacent panels, carbon weave, finish and the intended final composition should remain consistent when the program is developed in stages. Is the BMW XM Carbon Fiber Hood a Replacement Panel? Yes. The vented carbon fiber hood replaces the factory panel. Its fitment includes alignment with both fenders and the grille area, consistent panel height, secure locking and the transfer of the applicable factory components. Does the BMW XM Rear Diffuser Retain Factory Sensors and Tow-Hitch Access? Yes. The rear diffuser is designed around the XM’s original parking sensors, light strip, wiring and exhaust area. A dedicated access cover also retains use of BMW’s electrically deployable tow hitch on equipped vehicles. Is Professional Installation Recommended for the BMW XM Body Kit? Yes. Professional installation is recommended for the complete package and larger replacement components. Correct alignment, mounting, panel operation and restoration of the surrounding factory functions are all part of the finished installation. Conclusion: Planning a BMW XM Body Kit for Daily Driving A cohesive BMW XM body kit connects the G09’s tall front, expansive sides and vertically structured rear while preserving the factory functions that support daily use. Within RevoZport’s Street Program, the BMW XM G09 body kit brings together nine carbon product types for the BMW XM, XM Label, XM Label Red and XM 50e from model year 2023 onward. The complete package creates the strongest continuity, while a focused configuration can place greater emphasis on the front architecture, side profile or stacked-exhaust rear. Body color, wheels, ride height and carbon finish determine how clearly each direction becomes part of the XM’s overall stance. Whether the program is developed as a complete exterior or around selected areas, the strongest result is one in which the carbon surfaces feel resolved across the full scale of the XM.
Carbon Fiber Weave Guide
technical

September 01, 2026

Carbon Fiber Weave Guide for Car Parts: Plain, 2×2 Twill, and 3×3 Twill

Carbon fiber weave affects the pattern you see, how the fabric follows a mold during layup, and how exposed parts relate visually across a car. Plain weave creates a tight, regular grid. A 2×2 twill produces the familiar diagonal pattern found on many carbon components, while a 3×3 twill creates a broader repeat that stands out across larger surfaces. The complete laminate, resin system, curing process, component design, and installation determine the finished part’s weight, strength, stiffness, and quality. This guide compares the three weave patterns, explains the difference between weave sequence and tow count, and shows how to coordinate exposed carbon across your build. What Is Carbon Fiber Weave and Why Does It Matter on Car Parts? Carbon fiber weave is the repeating pattern created when bundles of carbon filaments cross to form fabric. On exposed carbon fiber car parts, it shapes the visible pattern, affects fabric handling during layup, and influences how the material follows a mold. How Carbon Fiber Weave Patterns Are Formed A bundle of continuous carbon filaments is called a tow. Woven fabric arranges these tows in two main directions: warp tows run along the fabric, while weft tows cross them from side to side. The order in which the bundles pass over and under each other creates the weave pattern. Plain weave uses a one-over, one-under sequence. A 2×2 twill repeats two over and two under, while a 3×3 twill extends the sequence to three over and three under. Carbon components can also use unidirectional material, which aligns most fibers in one direction, or chopped fiber made from shorter pieces. A finished component may combine different fiber formats to support its geometry and intended loads. What the Visible Weave Shows The exposed surface shows the weave type, pattern scale, fiber direction, and placement across the component. On paired or adjoining parts, it can also reveal whether the pattern is mirrored or aligned consistently. The outer ply is one part of the component’s construction. Internal layers may use other orientations or local reinforcement around mounting areas. Fiber type, resin system, ply arrangement, curing method, and wall thickness complete the material specification. A gloss 2×2 description therefore identifies two surface details: 2×2 is the weave, and gloss is the finish. Laminate construction requires its own material and manufacturing specification. How Do Plain, 2×2 Twill, and 3×3 Twill Carbon Fiber Weaves Compare? Plain weave, 2×2 twill, and 3×3 twill use different interlacing sequences, which change the fabric’s pattern, crimp, drape, and visual character. On an exposed car part, the clearest difference is how each pattern reads across the finished surface. What Do 2×2, 3×3, and K Counts Mean? The numbers in 2×2 and 3×3 describe the weave sequence. They indicate how many tows pass over and under the crossing bundles before the sequence repeats. K counts describe the number of individual filaments in a tow. Hexcel explains in its Carbon Fiber Selector Guide that the K value represents filament count. A 3K tow contains 3,000 filaments, while a 12K tow contains 12,000. A 3×3 twill and a 3K tow therefore describe separate properties. For example, a fabric can combine a 3K tow with a 2×2 twill. The weave sequence sets the interlacing pattern, while the tow count identifies the size of the fiber bundle. Plain Weave Plain weave carbon fiber passes each tow over one crossing tow and under the next. These frequent interlacing points create a compact checkerboard pattern with a regular, restrained appearance. The close weave helps the fabric resist distortion during handling. It also creates more fiber crimp and offers less drape than twill, so the material may require careful placement around complex curves. These characteristics make plain weave useful when pattern stability and a tight surface texture suit the part. Visually, plain weave gives exposed carbon a more understated role. It can work on small trim pieces or broad panels; the appropriate choice depends on the component shape and the intended design direction. 2×2 Twill Weave A 2×2 twill passes each tow over two crossing tows and then under two. The staggered repeat creates the continuous diagonal lines commonly associated with exposed automotive carbon fiber. Compared with plain weave, 2×2 twill has fewer crossovers and more drape. This helps the fabric follow many curved molds while maintaining a clear diagonal surface pattern. Layup control still determines how consistently those lines meet edges, openings, and compound curves. You will often see 2x2 twill weave carbon fiber on hoods, front lips, side skirts, spoilers, and interior trim. Its familiar appearance makes it a practical starting point for a coordinated carbon theme, although the final choice should still follow the component geometry and surrounding parts. 3×3 Twill Weave A 3×3 twill passes over three crossing tows and under three before repeating. When other fabric variables are comparable, this longer sequence creates a broader diagonal repeat than 2×2 twill. The pattern becomes especially visible across hoods, trunk lids, door panels, and wide diffuser sections. A gloss finish can give the broader repeat greater visual depth, while the selected tow size also affects the apparent width and scale of the pattern. The longer repeat needs controlled placement around edges, openings, and curved details to maintain a consistent exposed surface. A 3×3 twill is therefore both a visual and manufacturing choice, while the complete laminate and component design determine finished performance. Plain weave, 2×2 twill, and 3×3 twill each create a distinct combination of pattern scale, fabric behavior, and visual character. Comparison Point Plain Weave 2×2 Twill 3×3 Twill Interlacing Sequence One over, one under Two over, two under Three over, three under Visual Character Tight, regular grid Familiar diagonal flow Broader diagonal repeat Crimp and Drape More crimp and less drape Fewer crossovers and more drape Longer repeat with controlled placement Pattern Scale Compact Medium Broader when other fabric variables are comparable Automotive Use Restrained, technical appearance Versatile exposed-carbon appearance Stronger visual presence across larger surfaces Plain weave suits a restrained, technical carbon finish. A 2×2 twill creates the familiar diagonal appearance used across many exposed automotive parts, while a 3×3 twill gives the pattern greater presence on larger surfaces. Component geometry, tow size, laminate design, and finish determine how each weave performs and appears on the finished part. Does Carbon Fiber Weave Determine the Strength and Performance of Car Parts? Carbon fiber weave influences fabric handling and fiber geometry, but the complete laminate and component design determine the strength, stiffness, weight, and performance of a finished car part. How Weave Architecture Influences the Fabric Weave architecture changes crossover frequency, fiber crimp, fabric stability, and drape. Plain weave uses frequent crossovers to create a stable grid. Twill uses longer floats and fewer interlacing points, which gives the fabric more freedom to follow curved forms. These characteristics affect the material during handling and molding. Drape influences how the fabric settles into a complex tool, while crimp changes how straight the fibers remain within the woven layer. Layup control, pressure, resin distribution, and mold geometry also shape the cured result. Weave architecture is therefore one engineering input within a larger material system. Fiber grade, tow size, resin system, ply direction, component geometry, and the manufacturing process all affect how the finished part behaves. Why the Complete Laminate Matters More Than the Surface Pattern A finished laminate combines its fiber type, resin, ply count, fiber directions, wall thickness, curing method, local reinforcement, and mounting geometry. Together, these choices connect the material structure to the loads and shape of the component. The exposed outer ply establishes the visible pattern, while the layers beneath it can use different orientations or local reinforcement around brackets, fasteners, leading edges, and other highly loaded areas. A decorative cover therefore requires a different laminate specification from a splitter plane or wing element designed to retain its shape under aerodynamic load. Material preparation and curing also form part of that specification. The manufacturing differences discussed in dry carbon vs wet carbon are separate from whether the visible layer uses plain, 2×2, or 3×3 weave. Two parts can share the same 2×2 twill surface while using different internal structures. Comparing the full construction, component purpose, mounting design, and installation provides a more useful performance picture than the surface weave alone. How Should Carbon Fiber Weave Be Matched Across Car Parts? Match carbon fiber weave by comparing pattern scale, direction, construction, and finish across the complete build. These details help separate parts look like elements of one planned exterior rather than unrelated additions. Match Pattern Scale to the Part and the Build Large exposed surfaces make weave scale easier to see. A hood presents a broad field of carbon, while a canard or mirror cap reveals only a small section of the repeating pattern. Use part size as a visual reference, then choose the pattern that supports the build direction. Plain weave gives exposed carbon a tighter, more technical texture. A 2×2 twill creates a familiar diagonal flow, while a 3×3 twill gives the pattern greater visual presence across broad panels. Future additions also affect the choice. A hood installed today may later sit beside a carbon grille, front lip, fenders, side skirts, spoiler, and rear diffuser. Planning those relationships early makes it easier to maintain a coherent carbon theme as the build develops. Check Weave Direction Across Adjacent Components Two parts can use the same 2×2 twill and still appear mismatched when their diagonal lines run in conflicting directions. The difference becomes most visible where panels meet or where a front lip continues into side extensions. Paired components also benefit from a clear direction strategy. Mirrored layup can create symmetry across the vehicle’s centerline, while consistent directional placement can carry visual movement along each side. The body shape and the relationship between adjoining parts determine which approach looks more natural. Close-up product photos reveal surface quality, but installed views provide more context. They show how light, curvature, panel gaps, and surrounding carbon components change the apparent direction and scale of the weave. Match Weave, Construction, and Finish Weave, construction, and finish describe different aspects of a carbon component. Weave identifies the repeating pattern, such as plain, 2×2 twill, or 3×3 twill. Construction covers the fiber, resin system, layup, and curing process. Finish defines the gloss, matte, carbon tone, and clear-coat appearance of the exposed surface. Structural forged carbon uses short or discontinuous fibers throughout the molded laminate, creating its irregular pattern. A forged-carbon finish uses the same fragmented visual character with its specified underlying construction. RevoZport’s BMW M3 G80 Street Hood combines prepreg dry-carbon construction, Toray 3×3 weave, and a gloss exposed finish. The broader pattern follows the hood’s large surface, while the clear coat adds depth and UV protection. Across a coordinated build, consistent weave direction, carbon tone, and clear-coat appearance help the hood, front lip, side components, and rear aero read as one carbon program. Frequently Asked Questions  How Can You Tell 2×2 From 3×3 Carbon Fiber? Look at the length of the diagonal repeat. A 2×2 twill passes over two tows and under two, while a 3×3 twill extends the sequence to three over and three under. The 3×3 pattern usually appears broader when tow size and other fabric variables are comparable. Use the product specification alongside photos. Tow width, panel curvature, camera angle, and lighting can make the apparent pattern scale difficult to judge from an image alone. How Do Gloss and Matte Finishes Change the Way Carbon Weave Looks? Gloss and matte finishes can cover the same plain, 2×2, or 3×3 weave. Gloss creates stronger reflections and often gives the pattern greater visual depth. Matte diffuses highlights and produces a softer, more restrained appearance. Lighting can also change the apparent carbon tone and pattern contrast. Our guide to Matte carbon fiber vs gloss explains how each finish affects an exterior build. Can 2×2 and 3×3 Carbon Fiber Parts Be Used on the Same Car? Yes. A build can combine 2×2 and 3×3 carbon fiber when their placement creates a clear visual hierarchy. One pattern can define the main exposed panels, while the other appears on smaller or visually separated components. Compare weave direction, carbon tone, gloss level, and the distance between the parts. Mixing patterns looks more deliberate when the change follows the vehicle’s design zones rather than occurring between directly adjoining panels. Conclusion: Choosing Carbon Fiber Weave for Car Parts Carbon fiber weave types differ in interlacing sequence, fabric behavior, and visual character. Plain weave creates a tight grid, 2×2 twill produces a familiar diagonal flow, and 3×3 twill creates a broader repeat. The 2×2 and 3×3 labels describe weave sequences, while 3K, 6K, and 12K identify the number of filaments within each tow. RevoZport pairs Toray woven carbon with prepreg dry-carbon construction, model-specific geometry, and controlled exposed finishes on selected components. Careful weave placement allows the pattern to follow each panel’s shape, while coordinated carbon tone and clear-coat appearance give separate exterior parts a consistent finish. This material and design approach helps a complete RevoZport build read as one integrated carbon program.
Audi RS5 Body Kit Guide
Street

August 31, 2026

Audi RS5 Body Kit Guide: B9.5 Sportback vs Coupe Fitment

The right Audi RS5 body kit depends first on whether the car is a pre-facelift B9 or facelift B9.5, then on whether it is a Sportback or Coupe. Those details determine the bumper, grille, diffuser, and spoiler geometry before material or component choice enters the decision. For the B9.5 platform, RevoZport separates the four-door Sportback and two-door Coupe into model-specific Street Program applications. This guide explains how to identify the correct fitment, compare the two body styles, understand complete-kit and modular options, choose between carbon fiber and FRP, and plan the installation. Which Audi RS5 Body Kit Fits Your Car: B9 or B9.5? The RevoZport Street Program is shaped for the facelifted B9.5 Audi RS5. Its front and rear components follow the revised bumpers, grille, lighting and adjoining body surfaces, making generation the first fitment distinction. Audi brought the updated RS5 Coupe and Sportback to European dealerships in spring 2020. The facelift introduced a flatter and wider Singleframe grille, pentagonal side air inlets, new sill trims, revised lighting and a redesigned rear bumper and diffuser area. The official Audi RS5 facelift overview shows how these changes reshape the front, side and rear of the updated cars. These surfaces define how each carbon component meets the vehicle. The front lip follows the lower bumper profile, the grille and canards frame the revised front openings, and the rear diffuser aligns with the facelift bumper and oval exhaust surrounds. Correct fitment therefore begins with the physical interfaces of the car rather than its general appearance. For RevoZport fitment, the B9.5 Sportback application begins with model year 2020, while the B9.5 Coupe application covers model years 2021 to 2023. An RS5 produced near the facelift transition can be identified through its VIN and production information together with the bumper, grille and lighting design. Body style forms the next fitment distinction. The five-door Sportback and two-door Coupe use separate component collections shaped around their respective bodywork. What Changes Between Audi RS5 Sportback and Coupe Body Kits? Sportback and Coupe body kits must be selected separately because RevoZport lists model-specific components for each body style. Both programs follow the same front-to-rear Street Program structure, but that does not make similarly named parts interchangeable. Fitment Point RS5 B9.5 Sportback RS5 B9.5 Coupe Body Style Five-door liftback Two-door coupe Current RevoZport Range 2020+ 2021–2023 Component Categories Front lip, grille, canards, hood, side skirts, rear diffuser, and spoiler Front lip, grille, canards, hood, side skirts, rear diffuser, and rear spoiler Rear Components Shaped for the Sportback rear opening, roofline, and bumper Shaped for the Coupe trunk profile, roofline, and bumper The difference is most visible at the rear. The Sportback’s liftback opening and longer roof arc create a different upper and lower rear profile from the Coupe’s conventional trunk layout. The spoiler must follow the correct trailing edge, while the diffuser must align with the corresponding bumper and exhaust surrounds. Use the Audi RS5 B9.5 Sportback collection for the five-door Sportback and the Audi RS5 B9.5 Coupe collection for the two-door Coupe. Match each component to its body-specific collection, including the front lip, side skirts, diffuser and spoiler. What Does a Full Audi RS5 Body Kit Include? A full Audi RS5 body kit connects the front, side, and rear through components developed around one exterior direction. RevoZport’s current B9.5 Sportback and Coupe programs include a front lip, grille, canards, hood, side skirts, rear diffuser, and body-style-specific rear spoiler. At the front, the lip gives the lower bumper a stronger horizontal edge beneath the Singleframe grille. The grille component develops the center of the front fascia, while the canards add controlled definition around the outer bumper openings. Above them, the carbon fiber hood introduces a larger exposed-carbon surface that connects the upper and lower sections of the nose. The side skirts continue the lower line along the profile. On the Sportback, they support the visual length created by the five-door roofline. On the Coupe, they reinforce the transition between the front section and the rear haunches. The rear diffuser then adds depth around the oval exhaust outlets, while the correct Sportback or Coupe spoiler completes the upper rear profile. The exposed carbon finish also becomes part of the design. Consistent weave orientation and material continuity allow the hood, lower aero components, and rear pieces to read as one composed exterior rather than isolated accessories. This relationship between carbon-fiber aesthetics and connected body lines gives the complete program its technical, performance-led visual character. A complete package produces the strongest front-to-rear continuity, but the same program can be developed in stages. A modular build can begin with the angle of the car that needs the most visual work, such as the front lip and grille or the diffuser and spoiler, before extending the same material direction along the sides and hood. This philosophy continues across RevoZport’s Audi programs. The RS3, RS4, and RS5 retain their own proportions while following one RS design language built around controlled shoulder lines, strong lower-body horizontals, and coordinated carbon surfaces. RevoZport’s current RS5 B9.5 program follows a Street direction and works around the factory-width Sportback or Coupe body. It develops the front, side, and rear without introducing a separate wide-body conversion, keeping the project focused on model-specific carbon components and the original RS5 proportions. Carbon Fiber or FRP: Which Material Suits an RS5 Body Kit? Carbon fiber suits an RS5 build focused on low component mass, high stiffness, exposed material quality, and a cohesive performance aesthetic. FRP is more closely aligned with painted projects that prioritize lower initial material cost and familiar body-shop repair methods. Carbon fiber has a high stiffness-to-weight ratio, which makes it suitable for broad exterior components such as hoods, side skirts, and diffusers. Its exposed weave also creates a material contrast that can continue from the front of the car to the side and rear when the component finishes and weave direction are planned together. FRP generally requires surface preparation and paint. Its repair process is familiar to many body shops because damaged areas can often be sanded, filled, reshaped, and refinished. Carbon-fiber repair calls for composite-specific assessment when the weave, laminate, resin, or mounting structure has been damaged. The visual result also differs. Painted FRP follows the selected body color or paint treatment, while exposed carbon depends on weave consistency, clear-coat quality, and the relationship between adjoining components. On an RS5, that exposed-carbon finish can support both the car’s premium character and a more technical exterior direction. RevoZport’s carbon-fiber manufacturing approach uses Toray pre-preg material and autoclave curing. For the Audi RS design program, the standard specification is a 2×2 twill carbon pattern with a gloss finish, with alternative finish options depending on the selected component and build specification. The guide to carbon fiber vs fiberglass body kits provides a broader comparison of weight, finish, repair, and ownership considerations across both materials. How Is an Audi RS5 Body Kit Installed? Audi RS5 body kit installation depends on the selected components. The carbon fiber hood replaces the factory panel, while the front lip, grille component, canards, side skirts, diffuser, and spoiler use their own product-specific mounting arrangements around the original bodywork. Professional installation is appropriate for aligning a complete carbon package. RevoZport Street Program components are developed around application-specific, OEM-style fitment. The final result still depends on careful positioning. Panel gaps, edge height, left-to-right symmetry, weave direction, and the relationship between adjoining components should be assessed before final fastening. Installation normally begins with inspecting and dry-fitting each component. The technician can then establish the centerline, check contact surfaces, compare both sides of the car, and confirm clearance around the bumper, exhaust outlets, hood opening path, and adjacent panels. Final fastening and finishing follow only after the complete position has been established. The larger surfaces require particular attention. The hood must align with the fenders and front fascia and close correctly, while the side skirts need to carry an even lower line along the car. At the rear, the diffuser and body-style-specific spoiler should follow the corresponding Sportback or Coupe profile. Paint, partial body-color treatment, PPF, or wrapping should be planned after the initial fit has been approved. This allows exposed weave, covered surfaces, component overlaps, and film edges to be coordinated before final assembly. Use the RevoZport installation guide library to locate available instructions and downloadable files for supported products. The fitting information should match the exact component, model year, and Sportback or Coupe application. Frequently Asked Questions How Much Does an Audi RS5 Body Kit Cost? Audi RS5 body kit cost depends on the number of components, carbon specification, finish, installation labor, and any paint, wrapping, or PPF work. A complete front-to-rear package has a different scope from a modular build using selected components. Current prices should be taken from the matching Sportback or Coupe collection. Will a B9 Body Kit Fit a B9.5 Audi RS5? No. B9 and B9.5 exterior components should be selected separately because the facelift changed the grille, bumper openings, sill treatment, rear surfaces, and lighting. Use the VIN, production information, and visible facelift design to identify the correct generation. Are Audi RS5 Sportback and Coupe Body Kit Parts Interchangeable? No. RevoZport lists separate Sportback and Coupe applications. Even when both programs contain the same component categories, each part should be selected through the collection for the exact body style. Should an Audi RS5 Body Kit Be Test-Fitted Before Paint or PPF? Yes. Test-fitting establishes panel alignment, edge position, contact surfaces, component overlap, and the final exposed-carbon areas before paint or film is applied. This helps the installer coordinate the complete finish without removing newly completed surface work. Does Installing a Body Kit Affect Warranty or Insurance? Warranty and insurance treatment depends on the applicable policy, installation, location, and cause of a later claim. Inspect the components before installation, retain the product and fitting records, and document the completed modification for any insurer that requires declared vehicle changes. Conclusion The right Audi RS5 body kit starts with the exact generation and body style. B9 and B9.5 exterior geometry should be treated separately, while the B9.5 Sportback and Coupe each follow their own component path. Once fitment is established, the remaining decision is whether to create a complete front-to-rear carbon program or develop the exterior in coordinated stages. The RevoZport Audi RS5 B9.5 Sportback collection covers the five-door application, while the Audi RS5 B9.5 Coupe collection provides the corresponding two-door program. Use the matching collection to compare current components, finishes, and complete-kit options for the car.
BMW M4 Carbon Fiber Hood Guide
AeroStreet

August 31, 2026

BMW M4 Carbon Fiber Hood Guide: Fitment and Design

A BMW M4 carbon fiber hood should match your chassis, body style, factory hardware, and build goal. For the G82 Coupe and G83 Convertible, model-specific geometry determines how the hood meets the fenders, grille, bumper, and latch position. A complete replacement hood changes the panel’s construction, venting, finish, and installation requirements. A carbon skin or overlay mainly changes the visible surface. RevoZport also offers distinct Street and Race hood directions for these models. This guide compares OEM and carbon replacement construction, explains fitment and installation, and shows how to choose a hood that matches your road use, styling direction, or track-focused aero plan. How Does a BMW M4 Carbon Fiber Hood Compare With the OEM Hood? A BMW M4 carbon fiber hood can change the panel’s construction, weight, venting, finish, and visual role. The OEM hood remains the reference for factory appearance and alignment, while a carbon replacement creates a more distinct Street or Race direction. Weight and Construction A full replacement carbon fiber hood includes the outer skin, supporting structure, mounting areas, edges, and latch interface. A carbon overlay remains attached to the original hood and mainly changes its visible surface. The most useful weight comparison is between complete installed assemblies for the same chassis. The hood panel, vents, latch components, stops, trim, and transferred hardware all contribute to the installed result. The RevoZport Street and Race hoods replace the factory panel and provide weight reduction through their carbon construction. They combine a lighter panel with model-specific geometry and distinct design directions for street-focused or track-focused builds. Design and Venting The OEM hood follows BMW’s original surface treatment and front-end proportions. A replacement hood can introduce exposed carbon, stronger surface definition, and functional openings that give the upper half of the car a more technical character. The RevoZport Street hood uses a functional vented design to support airflow and heat extraction. Its corner detailing follows the G8X bodyline, making it suitable for owners who want a more defined front end without moving the entire build into a Race configuration. The RevoZport Aero hood belongs to the M4 G82 Race Program. It uses prepreg carbon fiber and forms part of a track-focused system that can include the splitter, canards, fenders, side skirts, diffuser, and rear wing. This gives the Race hood a clearer role in a coordinated front-to-rear aero build. The main differences are easier to compare here: Decision Point OEM BMW M4 Hood Carbon Fiber Hood Construction Factory panel and supporting structure Full replacement structure or appearance-focused overlay, depending on the product Weight Original installed assembly Compare the complete hood with its vents, latch components, trim, and transferred hardware Vent Design Defined by the original model specification Solid, functionally vented, or Aero Program design Finish Factory-painted surface Exposed, fully painted, or partially painted carbon Hardware Integrated into the factory configuration Retention and transfer depend on the specific hood Fitment Original reference for panel position and gaps Exact chassis compatibility and final panel alignment remain essential Build Direction Factory BMW appearance Street, show, or coordinated Race identity The OEM hood suits a factory-focused build. A carbon replacement becomes the stronger direction when exposed material, functional venting, weight reduction, or a more defined Street or Race identity is part of the plan. Which BMW M4 Carbon Fiber Hood Fits Your Build: Street or Race? Choose a BMW M4 carbon fiber hood by comparing its panel construction, vent design, finish, and intended use. For the G82 Coupe and G83 Convertible, RevoZport offers separate Street and Race directions with different roles in the finished build. Full Replacement and Carbon-Skin Construction A full replacement hood includes the outer skin, underside structure, edges, mounting areas, and latch interface. It replaces the factory panel and can change the hood’s weight, venting, finish, and overall design. A carbon-skinned hood uses a carbon outer layer over another supporting structure. An overlay attaches to part of the factory hood and mainly changes the visible surface. Both can show real carbon weave, but neither should be treated as the same type of upgrade as a complete replacement panel. The underside helps reveal that difference. Mounting points, panel edges, the latch area, inner construction, and vent openings show how the hood connects to the car. Two designs may look similar from above while serving very different structural and installation roles. Prepreg Dry Carbon Construction Prepreg carbon contains a controlled amount of resin within the reinforcement before layup. The material is shaped in the mold and cured under controlled heat and pressure, supporting consistent laminate quality across a large panel with complex curves. The RevoZport Street hood uses prepreg dry carbon, a Toray 3x3 weave, a gloss exposed-carbon finish, and a UV-resistant clear coat. The Race hood is also made from prepreg carbon, but its product specification and aero role remain separate from the Street design. Our guide to dry carbon vs wet carbon explains the manufacturing differences in more detail. For the final choice, look at the complete hood structure, model fitment, vent design, finish, and role within the rest of the car. Street Hood or Race Hood The Street hood is the stronger match for daily driving, street builds, and show cars. Its functional vents support airflow and heat extraction, while the corner detailing adds depth without overpowering the original G82 or G83 bodyline. The Race hood is intended for track-focused builds. Its CFD-developed strakes guide airflow, reduce turbulence, and improve rear-wing performance. The hood can be installed separately, but its aero role becomes more complete alongside the splitter, canards, fenders, side skirts, diffuser, and rear wing. Decision Point Street Hood Race Hood Main Build Goal Daily, street, or show use Track-focused aero build Vent and Aero Role Functional vents support airflow and heat extraction CFD-developed strakes manage airflow and support rear-wing performance Component Strategy Works as a focused hood upgrade or with coordinated Street components Can stand alone but has its clearest purpose within the Race aero system Visual Direction Refined carbon detail connected to the factory bodyline More technical and aggressive Race identity Best Starting Question How should the hood improve the front end without changing the whole character of the car? How will the hood work with the car’s front-to-rear aero plan? The Street hood fits owners who want a functional carbon replacement that remains suitable for regular road use. The Race hood fits a build where airflow management and coordination with the wider aero package guide the decision. Exposed, Painted, and Partially Painted Finishes A fully exposed finish gives the hood the strongest carbon presence because the panel occupies so much of the M4’s front profile. Full body-color paint keeps the appearance closer to the original car while retaining the replacement hood beneath it. Partial paint creates a middle direction. Body color can frame exposed carbon around the power dome, vents, or center section, allowing the hood to connect with both the paintwork and nearby carbon components. The exposed areas should also match the rest of the build. Weave scale, fiber direction, carbon tone, clear-coat depth, and gloss level influence how the hood looks beside the front lip, grille trim, vents, fenders, and mirror caps. How Should BMW M4 Carbon Fiber Hood Fitment and Installation Be Evaluated? Evaluate BMW M4 carbon fiber hood fitment through chassis compatibility, factory hardware integration, adjoining panel alignment, and final operation. Even a plug-and-play replacement benefits from careful positioning across the M4’s wide front end. G82 and G83 Compatibility Both the Street and Race hoods fit the BMW M4 G82 Coupe from 2021 and the G83 Convertible from 2021. The same applications also cover the BMW M3 G80 Sedan from 2021 and G81 Touring from 2022. The chassis code, model year, and body style establish the correct hood geometry and its relationship with the fenders, grille, bumper, and latch position. Street Hood Factory Hardware The RevoZport Street hood is a plug-and-play full replacement panel that requires no trimming. Installation transfers the OEM latch, rubber stops, and specified plastic parts to the carbon hood, while the original hood connecting rods remain on the car. Careful final fitting sets the side gaps, leading-edge height, latch engagement, and alignment with the adjoining panels. Before removal, the original hood provides a clear reference for these positions. Panel Gaps and Clearance A well-fitted hood should follow the fenders, bumper, grille, and front bodyline as one continuous surface. Model-specific geometry provides the starting shape, while careful adjustment establishes the final position. The first alignment pass should balance the hood between the fenders before setting the leading edge against the bumper and grille. Small adjustments across both sides help prevent a raised corner, uneven gap, or twisted front edge. The latch and rubber stops establish the closed height and secure engagement. The hood should also move through its full opening and closing range without contacting nearby components. Installation and Final Function Checks BMW M4 carbon fiber hood installation should begin with the factory panel as the alignment reference. Its side gaps, leading-edge height, and latch position show how the replacement hood should meet the rest of the front end. After the surrounding paintwork is protected, the installer can remove the factory panel and transfer the confirmed Street hood hardware. The replacement hood should remain slightly loose during the first fitting pass so both side gaps and the front edge can be adjusted together. The latch and rubber stops can then establish the final closed position. Gradual adjustment across the mounting points helps keep the panel balanced as the fasteners receive their final setting. The completed hood should open smoothly, close evenly, latch securely, and remain aligned with the fenders, grille, and bumper. Product-specific fitting information and BMW service data should guide the applicable fastener How Should a Carbon Fiber Hood Match the Rest of a BMW M4 Build? A carbon fiber hood should match the M4’s front-end proportions, carbon finish, and intended Street or Race direction. Because the hood occupies so much of the front profile, it sets the visual tone for the components around it. Front-End Visual Balance The G82 front end combines a tall grille with strong bumper forms and a low horizontal intake. A vented hood adds detail above the grille, so the front lip, grille trim, and vents should support the same level of visual intensity. For a Street build, the hood can work with restrained grille trim, front vents, and a front lip. This keeps the car suitable for daily road use while creating a more complete exposed-carbon front end. The BMW M4 G82 body kit collection presents these parts as a connected Street Program. For a Race build, the Aero hood can connect with the splitter, canards, fenders, side skirts, diffuser, and rear wing. The hood can be installed on its own, but its CFD-developed strakes have their clearest purpose within a coordinated front-to-rear aero strategy. Weave and Finish Consistency Matching carbon components involves more than choosing a gloss finish. Fiber direction, weave scale, carbon tone, and clear-coat depth affect how the hood appears beside the grille trim, front lip, vents, fenders, and mirror caps. A fully exposed hood creates the strongest contrast with the body color. Partial paint can connect more of the panel to the car while leaving carbon visible around the vents, power dome, or center profile. The paint line should follow the hood’s existing shape so the finish feels integrated with the panel. The RevoZport Street Series follows this coordinated OEM+ approach. Planning the hood and nearby carbon components together helps the front end read as one composition, even when the build develops in stages. Frequently Asked Questions  Does a BMW M4 Carbon Fiber Hood Need Hood Pins? Hood-pin requirements vary with the hood installation and the regulations of the event or racing class. For a track-focused BMW M4 build, the retention setup should follow the applicable technical rulebook and inspection standard. Can a BMW M4 Carbon Fiber Hood Be Partially Painted? Yes. A carbon fiber hood can be partially painted while leaving selected areas exposed. A paint shop experienced with composite panels can prepare the surface and place the paint line around the vents, power dome, or center profile. Partial paint can connect the hood with the body color without hiding the entire carbon surface. Our guide to painting carbon fiber explains the wider preparation and finish considerations. Can the Race Hood Be Installed Without the Complete Aero Kit? Yes. The RevoZport Race hood can be installed as a separate panel. Its CFD-developed strakes guide airflow, reduce turbulence, and improve rear-wing performance, so the design has its clearest aerodynamic role within a coordinated Race setup. Professional installation is recommended for Aero Program components. The complete plan should account for how the hood relates to the splitter, canards, fenders, side skirts, diffuser, and rear wing. Conclusion Choosing a BMW M4 carbon fiber hood begins with confirming G82 Coupe or G83 Convertible fitment and then matching the design to how the car will be used. Both RevoZport options provide weight reduction versus the factory hood. For a daily-driven, street, or show build, review the BMW M4 G82 Carbon Fiber Hood. Its functional vents support airflow and heat extraction while maintaining a coordinated Street direction. For a track-focused build, consider the BMW M4 G82 Carbon Fiber Race Hood. Its CFD-developed strakes guide airflow, reduce turbulence, and improve rear-wing performance. It can be installed separately but makes the most sense within a coordinated Race aero setup.
BMW M3 Carbon Fiber Hood Guide
Street

August 31, 2026

BMW M3 Carbon Fiber Hood Guide: Choosing Street or Race

A BMW M3 carbon fiber hood can change the front-end character, reduce weight versus the factory hood, and add functional airflow features. The right design depends first on the car, then on its role. A G80 Sedan used every day has different priorities from a G81 Touring prepared for regular track sessions. RevoZport offers two hood directions for BMW M3 G80 and G81 builds. The Street Hood pairs exposed carbon with functional vents and an OEM+ profile. The Race Car Hood uses integrated, CFD-developed strakes within a coordinated aero setup. This guide explains how to select between them, how carbon construction differs from the factory approach, and what installation involves. Which BMW M3 Carbon Fiber Hood Fits Your G80 or G81? The RevoZport Street and Race hood applications cover the BMW M3 G80 Sedan and G81 Touring. Start with the chassis code, body style and model year, then match the hood design to the car’s daily road use or track-focused aero direction. G80 Sedan and G81 Touring The G80 is the four-door M3 Sedan, with fitment beginning from model year 2021. The G81 is the Touring body style, with fitment beginning from model year 2022. The Street Hood application also extends to the current facelift models. Once fitment is established, the Street Hood suits daily, street and show builds, while the Race Hood supports a more track-focused direction and a coordinated Race aero setup. G82 M4 Coupe The hood application also extends to the BMW M4 G82 Coupe from model year 2021, placing it within the same G8X Street and Race hood range. Should You Choose the Street or Race BMW M3 Carbon Fiber Hood? Choose the Street Hood for a daily-driven, street, or show build. Choose the Race Car Hood for a track-focused M3 with a coordinated aero direction. Both reduce weight versus the factory hood. Street Program Hood The BMW M3 G80 Street Hood is a full replacement panel made from prepreg dry carbon fiber. Its Toray 3x3 weave, gloss exposed-carbon finish, and UV-resistant clear coat give the front of the car a defined carbon surface without overpowering the original body lines. Functional vents support airflow and heat extraction from the engine bay. Their shape is built into the panel, while the hood corners add visual depth that works naturally with other Street Program carbon pieces. This combination suits an M3 used for daily driving, fast road use, or show presentation. It adds a more focused front end while keeping the build closer to a refined OEM+ direction. Race Car Hood The BMW M3 G80 Race Car Hood moves the focus toward track aerodynamics. Its prepreg carbon construction includes CFD-developed strakes that guide airflow along the sides of the car, reduce turbulence, and improve rear-wing performance. The Race Car Hood can be installed separately. Its aerodynamic role becomes more complete alongside the splitter, fenders, side aero, diffuser, and rear wing in the BMW M3 Aero Program. Together, these components create a clearer front-to-rear airflow direction across the build. Integrated strakes also give the hood a stronger motorsport character. This makes the Race design the better match for an M3 developed around track use, aero balance, and a complete Race Program appearance. Street vs Race Selection The main differences are build purpose, airflow treatment, and how the hood relates to the rest of the car. Decision Area Street Hood Race Car Hood Best suited to Daily, street, and show builds Track-focused builds Surface design Functional vented panel CFD-developed integrated strakes Airflow role Supports engine-bay airflow and heat extraction Guides side airflow, reduces turbulence, and improves rear-wing performance Visual direction Refined OEM+ carbon appearance Stronger motorsport profile Wider build context Works naturally with Street Program carbon pieces Can stand alone but makes the most sense within a coordinated Race aero setup For a road-led G80 or G81, the Street Hood keeps the emphasis on functional venting, exposed-carbon finish, and a restrained exterior direction. The Race Car Hood suits a build organized around track use, prominent rear aero, and a stronger relationship between the front and rear of the car. How Does a Carbon Fiber Hood Compare with the OEM BMW M3 Hood? A carbon fiber hood replaces the factory panel with a prepreg composite structure designed around weight reduction, visible carbon, and model-specific airflow features. The Street and Race designs change the front of the M3 in different ways, so the value extends beyond the material alone. OEM and Carbon Hood Differences The factory BMW M3 hood belongs to the original production package and follows BMW’s standard exterior design. A RevoZport hood introduces a more specialized Street or Race direction while retaining a model-specific replacement format. Area Factory BMW M3 Hood RevoZport Carbon Fiber Hood Design role Original production integration Street or Race build direction Visible finish Factory painted surface Exposed carbon or a professionally prepared painted finish Airflow treatment Factory hood design Functional Street vents or CFD-developed Race strakes Build value Standard vehicle configuration Weight reduction, visual change, and a defined airflow role Beyond weight reduction, the carbon hood also changes the visual character of the M3. The exposed weave, vent geometry, and sculpted surface bring carbon-fiber aesthetics together with an aero-led sense of form. The Street Hood remains closer to an OEM+ road-car theme through its restrained profile and functional vents. The Race Car Hood gives the panel a stronger aerodynamic relationship with the side airflow and rear wing. Both designs provide weight reduction versus the factory hood. For a street build, that benefit comes with a large exposed-carbon feature at the front of the car. For a track-focused build, the hood becomes one part of a wider plan involving weight, airflow, and the surrounding aero components. How Do Carbon Construction, Weave, and Finish Affect Your BMW M3 Build? Construction determines panel quality and consistency, while weave and finish determine how the hood integrates with the rest of the car. A well-planned build treats all three as connected choices. Dry Carbon vs Wet Carbon Dry carbon and wet carbon differ in how resin enters the laminate. Dry carbon commonly refers to prepreg material, where resin is controlled within the carbon reinforcement before curing. This process supports consistent fiber-to-resin distribution, low weight, dimensional accuracy, and a clean surface. Wet layup applies resin during fabrication and can vary more with the process and part geometry. RevoZport forms the hood from Toray prepreg carbon using autoclave curing. Developed as a model-specific replacement panel, the construction combines weight reduction versus the factory hood with the geometry required for clean alignment around the fenders, grille and adjoining front-end panels. A complete carbon hood is defined by both its material specification and the precision of the finished panel. Mold accuracy, controlled curing, clean trimming, surface finishing, mounting-point geometry and final alignment all shape how naturally the hood sits within the front end. Weave Direction and Scale The Street Hood uses a Toray 3x3 carbon weave. Its broader pattern is easy to see across a large panel and gives the M3 hood a distinct performance surface. Weave direction becomes more noticeable where the hood meets a carbon grille, front lip, fender detail, mirror cap, or roof. A coordinated build uses a consistent visual direction across the most prominent pieces. Exact weave continuity will vary with each component’s shape and manufacturing layout. Exposed Carbon or Paint-Matched Finish Exposed gloss carbon makes the hood one of the strongest visual features on the car. It works well when the build already includes visible carbon at the front, sides, or rear. The Street Hood’s UV-resistant clear coat supports this exposed finish. A paint-matched finish creates a more restrained result. Selected carbon areas can also remain visible to frame vents or panel details, depending on the body shop’s finishing plan. Composite preparation and paint work should be handled by a shop experienced with carbon panels so the final surface remains even around edges and openings. What Does BMW M3 Carbon Fiber Hood Fitment and Installation Involve? Both RevoZport hood designs use a plug-and-play replacement format with no trimming. Street Hood installation involves removing the factory panel, transferring the confirmed retained parts, and aligning the carbon hood with the surrounding front-end panels. Model-Specific Panel Alignment A model-specific hood still needs careful alignment with the fenders, headlights, grille, and front bumper. A small change at the hinges can affect the gaps along several edges, so the panel should be positioned gradually rather than tightened in its first resting position. The finished setup should give the hood an even closed position without placing unnecessary pressure on the corners or adjoining painted surfaces. This alignment work is part of achieving the clean panel relationship expected from a large exposed-carbon component. OEM Latch and Retained Parts The Street Hood reuses the OEM latch, rubber stops, and related plastic parts. The original hood connecting rods also remain in place. These parts are transferred as the replacement panel is installed. The latch, stops, and panel position should be set together. Correct adjustment supports consistent closing and helps the hood sit evenly against the surrounding bodywork. Plug-and-Play Installation Plug-and-play fitment allows the hood to replace the factory panel without trimming. Installation includes transferring the applicable factory hardware, positioning the hinges, adjusting the latch and establishing even panel gaps across the front end. Professional installation provides the control needed to handle and position a large carbon panel. Gradual alignment helps protect the clear coat, carbon edges, surrounding paint and adjoining bodywork throughout the fitting process. Final Fitment and Installation Resources Correct fitment combines secure latch operation, even panel gaps and clear spacing around the fenders, headlights, grille and bumper. The hood should open, close and lock smoothly without contacting the adjoining panels. The RevoZport installation guide library provides fitting resources for model-specific components. Workshops can follow the corresponding Street Hood guide for factory-part transfer, positioning and alignment. Frequently Asked Questions Does a G80 BMW M3 Hood Fit the G81 Touring and G82 M4? Yes. The current RevoZport hood application covers the G80 M3 Sedan, G81 M3 Touring, and G82 M4 Coupe. Match the hood to the exact chassis, body style, and model year before installation. Does a BMW M3 Carbon Fiber Hood Require Trimming? No. The Street and Race hoods use a plug-and-play replacement design with no trimming. Installation still involves positioning the panel, transferring the applicable retained parts, and aligning the latch and surrounding panel gaps. Can the Race Car Hood Be Installed Without the Full Aero Program? Yes. The Race Car Hood can be installed as a standalone replacement panel. Its CFD-developed strakes make the most sense within a coordinated Race aero setup that manages airflow from the front of the car toward the rear wing. Can a BMW M3 Carbon Fiber Hood Be Painted to Match the Body? Yes. A carbon fiber hood can be professionally prepared and painted to match the body. You can use a complete body-color finish or retain selected exposed-carbon areas around the vents and surface details. Does a BMW M3 Carbon Fiber Hood Need Hood Pins? Hood-pin requirements depend on the installed configuration and the rules for the car’s track-day or competition class. Review the applicable event rulebook and technical inspection requirements when preparing a track-focused M3. Conclusion: Which BMW M3 Carbon Fiber Hood Matches Your Build? The Street Hood is the closer match for a G80 or G81 built around daily use, refined exposed carbon, show presentation, and functional heat extraction. The Race Car Hood suits an M3 with a track-led identity, integrated strakes, and a coordinated front-to-rear aero setup. Begin with the car’s chassis and model year, then align the hood with its road or track role, carbon finish, adjoining parts, and installation plan. Review RevoZport’s Street and Race configurations alongside the front, side, and rear components planned for the build.
Hood Vent Guide
technical

August 05, 2026

Hood Vent Guide: How Vents Work and When They Help

A hood vent gives heated, high-pressure engine-bay air a planned exit. In a suitable pressure zone, it can support radiator airflow, release trapped heat, and reduce pressure beneath the hood. Its value depends on placement, the route below the opening, and the vehicle’s complete cooling layout. This guide explains how hood vents work, when they help, and how vented hoods and cut-in louvers differ for street and track cars. How Do Hood Vents Work? Hood vents let heated, high-pressure air leave the engine bay. A well-positioned hood vent can support radiator airflow and reduce pressure beneath the front bodywork at speed. Heat Extraction Air enters through the grille and bumper openings as the car moves. Part of this flow passes through the radiator, absorbs heat, and enters the engine bay. A functional hood vent provides an outlet above the engine compartment. The pressure difference drives the process: air moves from the higher-pressure engine bay toward a lower-pressure area above the hood. A clear route between the radiator outlet and vent can support airflow through the cooling package. An SAE International road study measured a 1989 sedan during fan-off testing. Front-end and underhood components reduced the available airflow measured at the radiator exit by 84%. The vehicle-specific result shows how strongly the surrounding structure can affect the outlet path. A vent can also release heat around the turbocharger, exhaust manifold, intake, wiring, and nearby bodywork. Coolant temperature depends on the complete cooling system, including the radiator, thermostat, fans, ducting, coolant circuit, and heat exchangers. Hood Vents, Scoops, and Decorative Louvers A hood vent acts as an outlet, using its opening and louver shape to help heated engine-bay air move outward. A hood scoop normally faces the incoming airflow and feeds a ducted intake, intercooler, or another component. Decorative hood louvers may sit over a closed panel, where their role remains visual. Functional automotive hood vents create an open passage between the engine bay and the hood surface. Viewing the panel from below reveals whether heated air can reach the opening or whether the louvers are exterior trim. Why Does Hood Vent Placement Matter? Hood vent placement often has more influence than opening size. Effective extraction needs a useful pressure difference above the hood and a clear airflow route below it. A smaller opening in a suitable low-pressure region may extract air more effectively than a larger vent placed where outside pressure pushes air inward. Pressure Zones and Radiator Exit Air Pressure changes across the hood as exterior airflow meets the nose, follows the panel curvature, and approaches the windshield. Hood angle, grille design, ride height, windshield rake, and surrounding aero parts all influence the location of useful low-pressure regions. The vent also needs to align with the radiator-exit path. A boxed outlet or underhood shroud may direct heated air toward a specific area of the hood. Hood vent louvers shape the local surface flow around the opening. Blade height, angle, spacing, and orientation can influence extraction, while the area below the vent must remain clear of covers or solid shrouds that block the route. Pressure measurements, thermal sensors, wool-tuft testing, CFD, and controlled track tests can compare placement options under consistent conditions. Vehicle-Specific Hood Geometry The hood’s outer skin may appear open from above while reinforcement ribs occupy the same area underneath. These structures support panel stiffness, latch loads, and crash behavior, so the final vent position must account for both surfaces. Steel, aluminum, fiberglass, and carbon fiber panels require different cutting tools and edge treatments. Car hood air vents also need clearance from wiring, fluid reservoirs, ignition components, exposed filters, and moving engine parts. A model-specific template can align the vent with the pressure region, reinforcement layout, underhood clearance, and factory body lines. The finished installation can then support airflow while remaining visually integrated with the vehicle’s design. When Do Hood Vents Help on Street and Track Cars? Hood vents provide the most value during sustained heat load and higher-speed driving. They can also suit street cars when their fitment, drainage, and maintenance requirements work with daily use. Cooling and Aero Expectations Track driving keeps the engine, turbocharger, cooling system, and brakes under load for several laps. High ambient temperatures reduce the cooling package’s recovery time and make heat soak easier to observe. Turbocharged cars can retain considerable heat around the exhaust manifold and turbine housing after a hard run. A well-developed hood vent may release part of that heat while providing a clearer outlet for air leaving the radiator. The aerodynamic effect increases with speed. Pressure below the hood acts against the panel, while lower pressure above a well-positioned extractor helps draw air outward. Reducing underhood pressure can also reduce front-end lift. Ford studied this relationship while developing the 2020 Shelby GT500. Its engineers analyzed more than 500 cooling and aerodynamic designs, including a 6.03-square-foot louvered hood vent. The final vehicle paired its vent and removable rain tray with front ducting, heat exchangers, a splitter, underbody management, and rear aero components. A modified car requires the same system-level view. A front lip, splitter, flat floor, diffuser, or rear wing affects the vehicle’s broader aero balance, while the hood vent manages one part of the front airflow path. Rain, Washing, and Daily Use Street use adds water management to the hood vent design. Louver angle, rain trays, drain channels, and the position of electrical components influence where incoming water travels. A rain tray can shield sensitive areas, although it may restrict part of the extraction path. Removable trays allow some vehicle-specific systems to use different arrangements for regular road use and track driving. The drainage path should direct water away from exposed filters, ignition components, electrical connectors, reservoirs, and areas where moisture can collect. Low-pressure washing protects the vent openings and panel edges from concentrated spray. Product-specific guidance defines the appropriate rain-tray use, drainage, and maintenance for each hood and vehicle application. Which Hood Vent Setup Fits Your Car? A replacement vented hood and cut-in hood louvers suit different vehicle structures, airflow paths, water-management requirements, visual directions, and installation scopes. Replacement Hood or Cut-In Louvers Cut-in hood louvers retain most of the factory panel. Installation involves positioning a template, creating the opening, treating the exposed edges, and securing the louver insert. This route offers more placement flexibility but permanently changes the factory hood. The selected area must account for reinforcement ribs, panel curvature, underhood clearance, and left-to-right alignment. Metal hoods need corrosion protection at the cut edges. Composite panels require a cutting method that limits cracking, splintering, and surface damage. A complete carbon fiber hood replaces the factory panel and integrates the vents, exterior shape, and internal construction into one component. It can suit a build that calls for a larger material and design change. Cut-in car hood louvers may suit an owner who wants to retain the factory panel and finish. A replacement hood must integrate with the hinges, latches, panel gaps, washer hardware, seals, struts, and available opening clearance. Fitment and Installation Quality Correct fitment begins with the exact model, year, body style, and trim because vehicles within the same model family may use different hood shapes, latch positions, washer systems, or underhood layouts. The printed scale, reference points, panel curvature, and reinforcement position are validated against the physical car before cutting. Fasteners and edge treatments must then remain secure through heat, vibration, rain, washing, and repeated opening cycles. A replacement hood should follow the surrounding fender and bumper gaps, sit at the correct height, and engage both latches without excessive closing force. Professional installation is appropriate for composite cutting, structural trimming, latch adjustment, and unfamiliar carbon-fiber work. How Can a Vehicle-Specific Vented Hood Complete Your Build? A vehicle-specific vented hood can combine functional venting with the factory body lines, mounting points, and surrounding aero components. The hood forms one of the largest surfaces at the front of the car. Its center line, shoulder shape, vent position, and exposed carbon pattern influence the appearance of the complete front section. RevoZport’s carbon fiber hood collection includes model-specific applications for selected Audi, BMW, Chevrolet, and Tesla platforms. Available designs range from refined replacement hoods to more pronounced aero-focused options. Material, vent design, and installation requirements vary by product. Selected RevoZport hoods use Toray pre-preg carbon fiber and autoclave construction, while the matching product page identifies the compatible model years, finish, included parts, and fitment details. The rest of the exterior should follow the same design direction. A vented hood can connect with the bumper and front aero, then continue through the fender details and side skirts. This creates a more cohesive material and surface flow across the vehicle. The exact platform, road or track use, and intended level of visual change define the appropriate hood direction for the build. Is a Hood Vent Worth Adding? A hood vent is worth considering when its position connects high-pressure engine-bay air with a suitable low-pressure area above the hood. Effective venting also depends on a clear radiator-exit path, accurate fitment, and drainage suited to the vehicle. Track cars gain the most during sustained heat and higher-speed use, while street builds place more emphasis on water management, finish, panel alignment, and maintenance. The hood or louver setup should reflect the exact platform, driving conditions, and exterior direction. RevoZport’ model-specific hood range provides options for builds that need integrated venting and a more complete carbon front profile. Frequently Asked Questions Can Hood Vents Work at Low Speeds? Yes. Hood vents can release heat at low speeds through natural convection and fan-driven airflow. Extraction created by the pressure difference above and below the hood becomes stronger as vehicle speed increases. Do All Hood Louvers Need to Face the Same Direction? No. Louver direction depends on the local airflow and pressure around each opening. Paired hood louvers may mirror each other visually while keeping their blades oriented to support extraction. Is a Vented Hood Different From a Hood Louver Insert? Yes. A vented hood replaces the complete factory panel and integrates its openings into the hood structure. A louver insert requires the existing hood to be cut. Can I Add Hood Vents Without Changing the Rest of My Aero Parts? Yes. A cooling-focused hood vent can work without a complete aero package when its position and outlet path are suitable. Higher-speed builds also need a balanced relationship between the front and rear aero components.
 Carbon Fiber Trunk
technical

August 04, 2026

Is a Carbon Fiber Trunk Worth It? Carbon vs OEM Trunk Lids

A carbon fiber trunk is worth considering when lower panel mass, an exposed-carbon rear deck, and a more focused build justify the additional fitting work. It replaces the factory trunk lid, so panel alignment, transferred hardware, opening control, and weather sealing all affect the result. This guide compares carbon and OEM trunk lids by weight, fitment, hinges, springs, struts, locking functions, installation, and daily use. You will see where a full replacement adds value and when a spoiler may better suit a restrained OEM+ build. How Does a Carbon Fiber Trunk Compare With an OEM Trunk Lid? A carbon fiber trunk usually provides lower panel mass and a complete exposed-carbon rear deck. An OEM trunk lid provides the factory reference for panel alignment, integrated hardware, weather sealing, and opening control. Comparison Area Carbon Fiber Trunk OEM Trunk Lid Weight Usually lighter, with the actual saving determined by the vehicle, panel construction, and transferred hardware Often heavier, although the factory material varies by model Appearance Creates a complete exposed-carbon rear deck Preserves the original painted finish Fitment Uses model-specific geometry and requires dry fitting and final adjustment Provides the factory panel-gap and surface-height reference Hardware Usually requires the transfer of selected OEM components Arrives with the vehicle’s original systems integrated Opening Behavior Requires testing of the hinges, torsion springs, gas struts, and closing force Uses opening assistance matched to the factory lid Weather Sealing Relies on consistent weather-strip contact, latch height, rubber-stop position, and accessory sealing Uses the factory body, lid, and weather-strip combination Installation Requires panel fitting, hardware transfer, alignment, and function testing Retains the factory-installed panel and integrated systems Best Use Weight-focused, street-performance, track, and show builds Factory convenience, original finish, and service simplicity A complete trunk replacement suits a build that needs a stronger rear-deck change than a spoiler can provide. RevoZport’s carbon fiber trunk collection provides model-specific options designed to integrate with the vehicle’s rear profile. A spoiler remains the more restrained option when the goal is a smaller carbon accent. The OEM trunk lid then retains its original locking, wiring, sealing, trim, and opening system. How Much Weight Can a Carbon Fiber Trunk Save? Weight savings depend on the construction of the factory trunk and the hardware transferred to the carbon replacement. A like-for-like measurement provides the most reliable result. Why Weight Savings Vary by Vehicle Factory trunk lids may use steel, aluminum, or composite construction. Carbon replacements also vary in their outer skin, inner structure, reinforcement, and integrated spoiler design. The final installed weight includes the panel and its transferred equipment, such as the latch, wiring, camera, lights, trim, seals, and badges. This makes an assembled trunk heavier than its bare-panel figure. Shipping weight includes packaging and protective materials. A valid trunk-weight comparison uses measured bare-panel or assembled-panel figures for both lids. Like-for-Like OEM Weight Comparison A like-for-like comparison weighs the bare OEM and carbon lids on the same scale under the same conditions, with the hinges, latch, camera, lights, wiring, trim, spoiler, seals, badges, and packaging removed from both panels. A second measurement can compare both assembled lids with the same accessory configuration. Keeping bare-panel and assembled results separate provides a clear vehicle-specific comparison. How Weight Reduction Affects Performance A lighter trunk reduces total vehicle mass. The effect depends on the measured saving, the vehicle’s curb weight, and the other lightweight components included in the build. The trunk sits relatively high and toward the rear, so its weight can form part of a wider reduction program alongside lighter panels, seats, wheels, or exhaust components. According to the U.S. Department of Energy’s Lightweight Materials for Cars and Trucks, a 10% reduction in total vehicle weight can improve fuel economy by 6% to 8%. That figure applies to vehicle-level weight reduction, while the contribution of one trunk depends on its measured weight difference. An SAE International review of automotive lightweight materials also considers durability, appearance, assembly, manufacturing, and cost alongside mass reduction. Vehicle-specific testing is required to measure any change in acceleration or lap time. Will a Carbon Fiber Trunk Fit and Function Like the OEM Trunk? A model-specific carbon fiber trunk can retain the vehicle’s normal locking, lighting, camera, sealing, and opening functions. The final result depends on careful dry fitting, correct transfer of the OEM components, and adjustment at the hinges, latch, and rubber stops. Panel Alignment and OEM Mounting Points Fit the bare carbon trunk to the OEM hinge and latch locations before transferring its accessories. Keep the fasteners lightly tightened at this stage so the panel can move during the initial alignment. The trunk should sit evenly between the rear quarters and tail lights, with consistent panel gaps and surface height on both sides. The opening path and latch engagement also need to work through their full range before the electrical parts, seals, and interior trim move across. Small hinge adjustments control the left-to-right and front-to-rear position. The latch and rubber stops then set the resting height, closing effort, and weather-strip compression. These areas work together, so changing one position may require a second check of the surrounding gaps. Carbon composite panels require controlled mounting pressure during this process. Support the lid while making adjustments and use the product-specific installation requirements for any drilling, trimming, slotting, or additional hardware. Hinges, Springs, Struts and Opening Behavior The OEM hinges and latch can normally remain in use, although both may need adjustment after the lighter lid is fitted. The torsion springs or gas struts may also need recalibration because the factory opening system was set for the original trunk weight. A lighter carbon fiber trunk may rise too quickly, rebound at full opening, or require extra force to close when the original opening assistance remains unchanged. Excess spring or strut force can also increase the load around the hinge area. During the first opening cycles, hand support allows the lid speed and full opening path to be assessed safely. A balanced setup should rise smoothly, remain controlled near full opening, and close without excessive force. Some vehicles allow a reduction in torsion-spring preload, while others may require lower-force gas struts. The correct setting depends on the hinge geometry, installed trunk weight, and opening system used by the specific vehicle. Latch, Wiring and OEM Functions Once installed, a carbon fiber trunk becomes part of the vehicle’s mechanical and electrical systems. The hinges and latch provide the mechanical foundation, while the body-side striker normally remains on the vehicle and may need a small positional adjustment. Depending on the model, the transferred mechanical parts may include the latch, emergency release, weather seal, and rubber stops. Electrical equipment can include the camera, licence-plate lights, exterior opening button, wiring harness, rubber grommets, and a trunk-mounted third brake light. Interior trim and badges may also move to the replacement lid. The wiring harness needs enough movement for the trunk to open fully without pulling on a connector. Factory-style routing, clips, and rubber grommets help keep the cable away from panel edges and the hinge path. Latch height influences closing effort, panel gaps, surface flushness, and weather-strip pressure. Small adjustments at the hinges, latch, and rubber stops establish correct engagement before the opening and closing behavior is tested again. Final function testing covers the key, remote release, exterior button, emergency release, camera, licence-plate lights, third brake light, and any powered opening function fitted to the vehicle. Weather Sealing and Water Resistance A carbon fiber trunk relies on continuous contact between its sealing flange and the OEM weather strip. Panel alignment, latch height, rubber-stop position, accessory openings, and seal placement all influence water resistance. Seal contact is assessed around the corners and near the wiring, camera, lights, and spoiler mounting points, where changes in panel height or latch position can affect compression.A paper-strip pull test compares sealing pressure by measuring the resistance around the opening. Similar resistance at each position indicates more consistent contact between the flange and weather strip. Removable transfer material can reveal the contact pattern in areas that are difficult to judge visually. Once contact is even, a low-pressure water test from the roof toward the rear checks the seal under controlled conditions. The trunk lining, latch area, wiring openings, camera mount, licence-plate lights, and tail-light area provide the main inspection points for moisture. Small adjustments to the hinges, latch, rubber stops, or weather-strip position can correct the entry path before the water test is repeated. What Does Carbon Fiber Trunk Installation Involve? Carbon fiber trunk installation covers removal of the OEM lid, dry fitting of the bare carbon panel, transfer of the factory components, final alignment, and complete function testing. Following that sequence keeps the panel easier to position and leaves room for adjustment before final tightening. Preparing the Vehicle Before removal, the original panel gaps, hinge positions, latch height, and wiring route provide the reference for the replacement installation. Clear photographs preserve the cable routing, hardware orientation, trim position, and surface alignment for reassembly. The rear glass, tail lights, bumper, and adjacent painted panels require protection during removal. Two-person support keeps the OEM trunk stable while the wiring and hinge fasteners are disconnected.This keeps the panel stable and reduces the chance of a corner contacting the body or loading the rear glass unevenly. Fitting the Bare Carbon Panel Initial fitment uses the bare carbon lid before the camera, lights, wiring, trim, seals, or badges are transferred. This keeps the panel easier to support and preserves clear access to the hinges, latch area, and surrounding gaps. The basic geometry begins with the left-to-right and front-to-rear position, followed by surface height and latch engagement. Lightly tightened fasteners leave room for small corrections during this stage. Once the bare panel follows the surrounding body lines, transfer the factory equipment in an order that preserves access to the mounting points. Retain the original cable route where the replacement trunk provides suitable clips, channels, and grommet locations. Completing the Final Tests Final fastener torque follows successful testing of the electrical functions, opening speed, closing force, latch engagement, seal contact, and water resistance. This sequence allows small corrections without repeatedly removing the transferred components. Professional installation is the preferred route for most complete trunk replacements. A technician with composite-panel experience can support the lid correctly, distribute mounting load, and tighten the hardware without concentrating force in the laminate. An experienced owner may complete the installation with suitable tools, model-specific instructions, and a second person to support the panels. Product-specific fitment and installation information defines the required hardware and panel work before the OEM trunk is removed. Which Build Directions Suit a Carbon Fiber Trunk? A carbon fiber trunk offers the most value when lower panel mass or a complete exposed-carbon rear deck already supports the build direction. Owners seeking one restrained carbon accent may find that a trunk spoiler achieves the intended visual change with less installation work. Track and Performance Builds A carbon fiber trunk fits naturally into a track or performance build that already includes a planned weight-reduction program. Its measured saving can contribute to a larger total alongside lighter seats, wheels, exhaust components, or other exterior panels. Street-performance builds may place equal value on visual continuity. A carbon trunk can connect a carbon fiber hood, rear diffuser, spoiler, and related exterior parts into a more cohesive carbon package. Street and Show Builds A full exposed-carbon rear deck creates a stronger visual change than a spoiler and gives the rear profile a more complete material transition. This direction suits street and show builds where finish quality, panel alignment, and integration with the surrounding body lines carry as much importance as the scale reading. Regular road use places additional emphasis on locking, weather sealing, lighting, camera operation, and controlled opening. A well-fitted trunk should preserve these functions while supporting the intended exterior design. Visual-Only Builds A trunk spoiler provides a more restrained option when the goal is a single carbon accent. It retains the OEM lid, hinges, latch, wiring, interior trim, and original weather-strip relationship. The reduced installation scope also makes it easier to return the vehicle to its factory appearance. This direction can work well for an OEM+ build that needs a subtle rear detail instead of a complete exposed-carbon deck. What Defines the Right Carbon Fiber Trunk Setup? The exact vehicle application, panel construction, transferred OEM components, opening assistance, and installation requirements determine how well the carbon trunk fits the vehicle and functions in regular use. Exact Vehicle Fitment Correct fitment depends on the vehicle’s model year, body style, and facelift status. Sedan, coupe, and touring versions can use different rear openings even when they share the same model badge. Factory equipment also affects compatibility. A camera, power-opening system, trunk-mounted brake light, exterior release switch, or other lid-mounted feature may require a dedicated mounting provision. The model-specific product page defines the complete vehicle application and supported equipment. These details establish the basis of the installation plan. Panel Construction and Weight Data The product specification should identify whether the trunk is a complete replacement panel with both outer and inner structures. Its construction may include an exposed-carbon outer skin, inner frame, reinforcement, mounting areas, and provisions for the transferred hardware. Any weight figure should identify the measurement configuration. Bare-panel weight, assembled trunk weight, and packaged shipping weight describe different conditions and cannot be compared directly. The most useful measurement records the scale conditions and the hardware included with each lid. Evaluate the trunk through its construction, fitment, transferred components, and like-for-like measured weight. Hardware and Installation Planning Installation planning begins with the factory components that transfer to the carbon trunk while the OEM lid remains available as a reference. Depending on the vehicle, these parts may include the hinges, latch, emergency release, camera, lights, opening button, wiring, weather seal, rubber stops, interior trim, and badges. The opening system forms part of the same installation plan. Factory torsion springs or gas struts may require adjustment when the carbon lid is lighter than the original panel. The product-specific installation information should also identify any drilling, trimming, slotting, or additional hardware. A composite-panel installer can then plan the fitting method and mounting load around the actual trunk construction. Review How to Choose a Carbon Fiber Body Kit when the trunk forms part of a wider exterior program. Consistent construction, finish, fitment, and installation quality help the completed exterior feel cohesive. Is a Carbon Fiber Trunk Worth the Upgrade? A carbon fiber trunk is worth considering when measured weight reduction or a complete exposed-carbon rear deck supports the direction of your build. Track and performance cars gain the most value when the trunk forms part of a wider lightweighting program, while street and show builds may place more emphasis on finish, body-line integration, and a cohesive rear profile. The selected trunk should match the exact vehicle application, with transferred hardware, opening assistance, sealing, and installation planned as one system. RevoZport’s model-specific carbon fiber trunk collection provides a focused starting point for owners who want the completed panel to retain the vehicle’s everyday functions while delivering a stronger carbon exterior. Frequently Asked Questions Is a Carbon Fiber Trunk Lighter Than an OEM Trunk? A carbon fiber trunk is usually lighter, although the saving varies with the factory material, panel construction, and transferred hardware. A like-for-like comparison uses the same scale for both bare lids and matching accessory configurations for the assembled lids. Can a Carbon Fiber Trunk Use the Factory Hinges and Latch? Model-specific carbon trunks normally use the factory hinge and latch locations. Dry fitting and small adjustments at the hinges, latch, and rubber stops help set the panel gaps, surface height, closing force, and seal compression. Do I Need Different Trunk Springs or Struts? The factory springs or struts may remain suitable after adjustment. Lower spring preload or lower-force struts may be needed when the lighter lid rises too quickly, rebounds at full opening, or requires excessive closing force. Will a Carbon Fiber Trunk Leak? A properly aligned carbon trunk should work with the OEM weather strip. Consistent flange contact, correct latch height, adjusted rubber stops, and sealed accessory openings support water resistance. A low-pressure water test provides the final seal assessment. Does a Carbon Fiber Trunk Require Professional Installation? Professional installation is recommended for most complete trunk replacements. The work involves two-person panel handling, dry fitting, OEM component transfer, alignment, electrical testing, opening control, and water testing. Composite experience also helps distribute mounting load correctly.